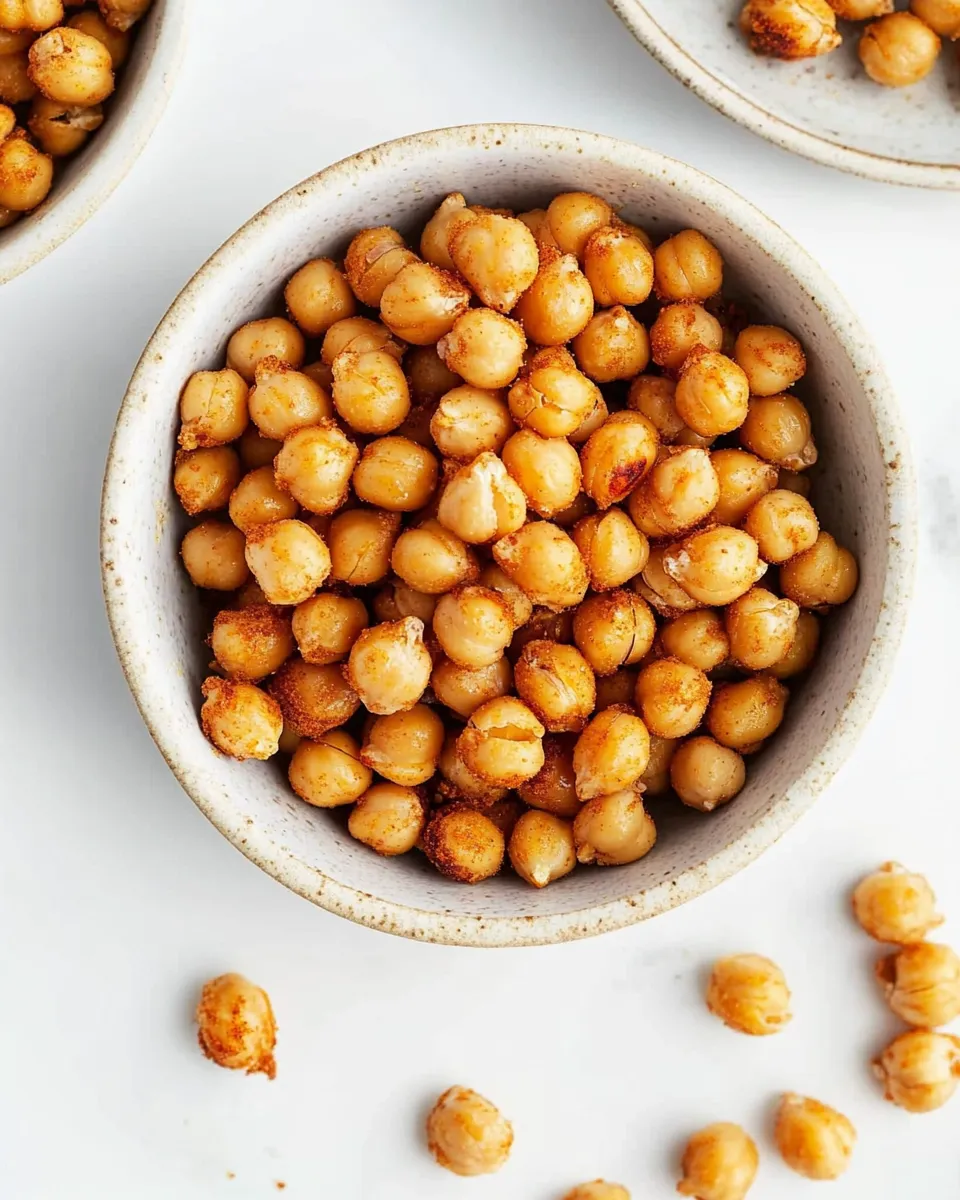
Crispy Air Fryer Chickpeas (3 Ways!)
Are you looking for a snack that’s not only delicious but also packed with protein and fiber? Look no further! Crispy Air Fryer Chickpeas are the perfect solution. They are crunchy, savory, and can be flavored in multiple ways to satisfy any craving. In this article, we’ll dive into three scrumptious variations of crispy chickpeas that you can whip up in your trusty air fryer. Whether you’re in the mood for something cheesy, zesty, or spicy, we have you covered.
Why Cooks Rave About It

Crispy Air Fryer Chickpeas have become a go-to snack for many home cooks. Their versatility is unmatched—they can be enjoyed as a quick nibble, tossed into salads for added crunch, or sprinkled over soups for texture. Unlike traditional frying, using an air fryer means you can achieve that satisfying crispiness with far less oil, making them a healthier alternative to chips or popcorn. Plus, they’re a breeze to prepare, taking only a few minutes from start to finish.
Ingredient Rundown
To create these crispy delights, you’ll need a few simple ingredients. Here’s what you’ll be using:
- 1 (15 ounce) can of chickpeas: The star of the show! Chickpeas are high in protein and fiber, making them a nutritious choice.
- 1 tablespoon olive oil: This adds a touch of richness and helps the spices stick to the chickpeas.
- 1 teaspoon garlic: Fresh or powdered, garlic adds depth to the flavor.
- 1/2 teaspoon salt: Essential for enhancing all the flavors.
- 1/2 teaspoon paprika: For a subtle smokiness and a hint of color.
- 1/4 teaspoon pepper: A bit of heat to round out the flavors.
- 2 tablespoons Parmesan: Optional, but it adds a delightful cheesy flavor to one of the variations.
- 1 1/2 tablespoons homemade taco seasoning: A mix of spices that brings a zesty kick to another variation.
What You’ll Need (Gear)
Before you get started, gather your kitchen essentials:
- Air fryer: The key appliance for achieving that crispy texture without deep frying.
- Mixing bowl: For tossing the chickpeas with oil and spices.
- Measuring spoons: To ensure your spice ratios are just right.
- Tongs or a spatula: For easily moving the chickpeas in and out of the air fryer.
Step-by-Step: Crispy Air Fryer Chickpeas (3 Ways!)
Step 1: Prep the Chickpeas
Start by draining and rinsing the chickpeas under cold water. This helps to remove excess sodium and any canning liquid. Once rinsed, pat them dry with a clean kitchen towel. The drier the chickpeas, the crispier they will get!
Step 2: Choose Your Flavor
You can make three different flavors of crispy chickpeas. Here’s how to prepare each one:
For Garlic Paprika Chickpeas:
1. In a mixing bowl, combine the chickpeas with 1 tablespoon of olive oil, 1 teaspoon of garlic, 1/2 teaspoon of salt, 1/2 teaspoon of paprika, and 1/4 teaspoon of pepper.
2. Toss until the chickpeas are evenly coated.
For Cheesy Garlic Chickpeas:
1. In a mixing bowl, combine the chickpeas with 1 tablespoon of olive oil, 1 teaspoon of garlic, 1/2 teaspoon of salt, and 2 tablespoons of Parmesan.
2. Toss until the chickpeas are thoroughly coated in the cheesy goodness.
For Taco-Spiced Chickpeas:
1. In a mixing bowl, combine the chickpeas with 1 tablespoon of olive oil and 1 1/2 tablespoons of homemade taco seasoning.
2. Toss to coat the chickpeas evenly with the seasoning mix.
Step 3: Air Fry the Chickpeas
1. Preheat your air fryer to 400°F (200°C).
2. Place the seasoned chickpeas in the air fryer basket in a single layer. Avoid overcrowding for the best results.
3. Air fry for 15-20 minutes, shaking the basket every 5 minutes to ensure even cooking. They should be golden and crispy when done.
Step 4: Cool and Enjoy
Once your chickpeas are crispy, remove them from the air fryer and let them cool for a few minutes. This allows them to crisp up even more. Serve them as a snack, toss them into salads, or use them as a topping for soups!
Health-Conscious Tweaks

If you’re looking to make your Crispy Air Fryer Chickpeas even healthier, consider these options:
- Reduce the amount of oil to 1/2 tablespoon for a lighter version.
- Experiment with different spices like cumin or curry powder for unique flavor profiles.
- Substitute nutritional yeast for Parmesan to keep it dairy-free while adding a cheesy flavor.
- Use low-sodium chickpeas to control your salt intake.
Pro Tips & Notes
- Make sure to dry the chickpeas thoroughly after rinsing. Excess moisture can prevent them from becoming crispy.
- If you prefer an extra crunch, consider soaking the chickpeas overnight before cooking.
- Feel free to experiment with your favorite herbs and spices! The possibilities are endless.
- Store any leftovers in an airtight container; they will stay crispy for a couple of days, but best enjoyed fresh!
How to Store & Reheat
To keep your crispy chickpeas at their best:
- Store any leftover chickpeas in an airtight container at room temperature for up to 2 days.
- To reheat, simply pop them back into the air fryer for a few minutes to regain their crunch.
- Avoid refrigerating crispy chickpeas, as moisture will make them soggy.
Reader Q&A
Can I use dried chickpeas instead of canned?
Absolutely! Just make sure to soak and cook the dried chickpeas beforehand, as canned chickpeas are already cooked and ready to go.
What can I use instead of olive oil?
Avocado oil or coconut oil are great alternatives that can also lend a different flavor profile to your chickpeas.
How do I know when the chickpeas are done?
The chickpeas should be golden brown and crispy. If they look a bit soft, give them a few more minutes in the air fryer.
Can I make these chickpeas spicy?
Definitely! You can add cayenne pepper, chili powder, or any hot sauce to your seasoning mix to give your chickpeas a spicy kick.
Because You Liked This
Final Bite
Crispy Air Fryer Chickpeas (3 Ways!) are a scrumptious, healthy snack that you can whip up in no time. With just a few ingredients, you can create a flavor-packed treat that will satisfy your cravings and keep your taste buds happy. Whether you prefer them with garlic and paprika, cheesy goodness, or a zesty taco seasoning, these chickpeas are sure to become a staple in your kitchen. So grab your air fryer, and let’s get cooking!

Crispy Air Fryer Chickpeas (3 Ways!)
Ingredients
Equipment
Method
- Start by draining and rinsing the chickpeas under cold water. Pat them dry with a kitchen towel.
- In a mixing bowl, combine chickpeas with olive oil, garlic, salt, paprika, and pepper. Toss until evenly coated.
- In a mixing bowl, combine chickpeas with olive oil, garlic, salt, and Parmesan. Toss until thoroughly coated.
- In a mixing bowl, combine chickpeas with olive oil and taco seasoning. Toss to coat evenly.
- Preheat your air fryer to 400°F (200°C). Place seasoned chickpeas in a single layer in the air fryer basket.
- Air fry for 15-20 minutes, shaking the basket every 5 minutes until golden and crispy.
- Remove chickpeas from the air fryer and let cool for a few minutes before serving.
Notes
- Dry chickpeas thoroughly to achieve maximum crispiness.
- For extra crunch, soak chickpeas overnight before cooking.
- Experiment with herbs and spices for personalized flavors.
- Store leftovers in an airtight container; best enjoyed fresh!