Buffalo Chicken Dip (No Ranch) Recipe
If there’s one dish that never fails to steal the show at parties, it’s Buffalo Chicken Dip. This creamy, cheesy concoction is the ultimate comfort food, and it’s perfect for game day, potlucks, or just a cozy night in. But what makes this Buffalo Chicken Dip stand out? It skips the ranch, allowing the bold flavors of the chicken and hot sauce to shine through. With a few simple ingredients and minimal effort, you can whip up a batch that will have everyone coming back for more. Let’s dive into this delicious Buffalo Chicken Dip (No Ranch) Recipe!
Why It Works Every Time

The beauty of this Buffalo Chicken Dip lies in its simplicity and flavor balance. By using cooked chicken and a combination of cream cheese, cheddar, and blue cheese, you get a rich and satisfying dip that packs a punch. The red hot sauce adds the perfect kick, while the cheese creates that gooey texture we all crave. Plus, it’s incredibly versatile, making it a crowd-pleaser for any occasion.
What Goes In
- 2 cups cooked chicken, cut into small cubes: This is the heart of the dip. Use leftover rotisserie chicken or quickly cook some chicken breasts for a fresh batch.
- 1 brick (8 oz) cream cheese, softened: This provides the creamy base that holds the dip together.
- 1 bottle (5 oz) red hot sauce: The star of the show! This is where the dip gets its signature heat and flavor.
- 1 cup shredded cheddar cheese, divided: This adds a delicious cheesy flavor and helps thicken the dip.
- 1/2 cup crumbled blue cheese: For those who love the tangy bite that blue cheese provides, it elevates the dip significantly.
- Cayenne pepper: Optional, but it can add an extra layer of heat if you like your dip spicy.
- Chopped fresh scallions (optional): A fresh, crunchy garnish that adds a pop of color.
- Celery and/or pita or tortilla chips for serving: Perfect dippers for this flavorful dip.
Recommended Tools
- Mixing bowl: To combine all the ingredients.
- Spatula: For mixing and transferring the dip.
- Baking dish: To bake and serve the dip.
- Oven: For melting and bubbling the dip to perfection.
The Method for Buffalo Chicken Dip (No Ranch) Recipe

Step 1: Preheat Your Oven
Preheat your oven to 350°F (175°C). This ensures your dip gets bubbly and golden as it bakes.
Step 2: Mix the Ingredients
In a large mixing bowl, combine the softened cream cheese and red hot sauce. Use a spatula to mix them together until smooth.
Step 3: Add the Chicken
Fold in the cooked chicken cubes, ensuring they are well coated with the creamy mixture.
Step 4: Incorporate the Cheese
Add in three-quarters of the shredded cheddar and all of the crumbled blue cheese. Stir until everything is well mixed.
Step 5: Transfer to Baking Dish
Spoon the mixture into a baking dish, spreading it out evenly.
Step 6: Top with Remaining Cheese
Sprinkle the remaining shredded cheddar cheese on top of the dip. This will create an irresistible cheesy crust.
Step 7: Bake
Place the baking dish in the preheated oven and bake for 20-25 minutes, or until the dip is bubbly and the cheese is melted.
Step 8: Garnish and Serve
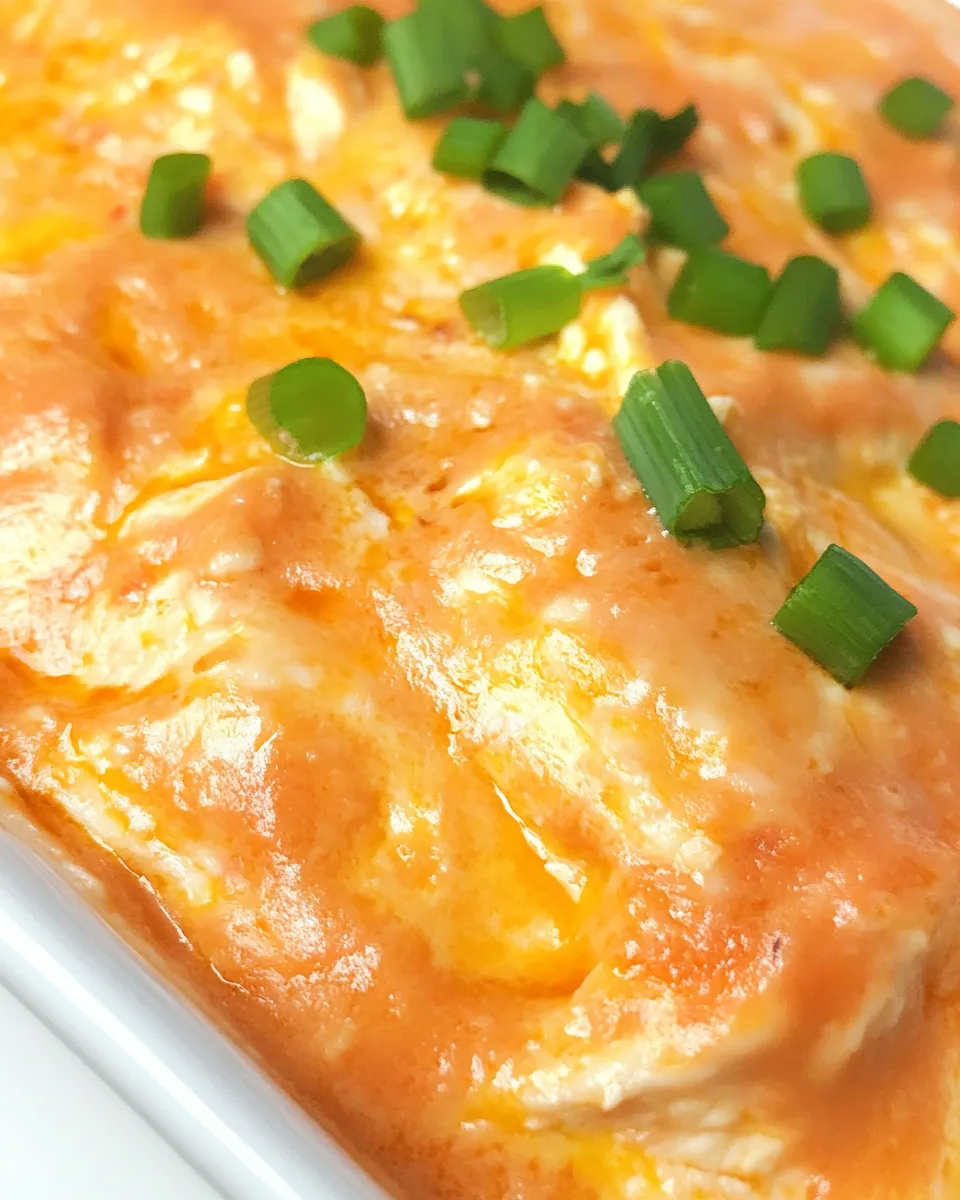
Once baked, remove the dip from the oven. Let it cool for a few minutes, then garnish with chopped scallions if desired. Serve hot with celery sticks, pita chips, or tortilla chips for dipping.
Ingredient Flex Options

- Use grilled chicken for a smoky flavor.
- Substitute with cream cheese alternatives if you’re looking for lighter options.
- Try pepper jack cheese for an extra spicy kick.
- Replace blue cheese with feta or omit it entirely for a milder taste.
Things That Go Wrong
- Dip is too thick: If your dip is too thick, add a splash of milk or more hot sauce to loosen it up.
- Too spicy: If it’s too hot for your taste, balance it by adding more cream cheese.
- Burnt cheese top: Watch the dip closely as it bakes. If the top is browning too quickly, cover it with foil.
- Chicken is dry: Ensure you use moist chicken. Leftover rotisserie chicken works best.
Keep It Fresh: Storage Guide
Buffalo Chicken Dip can be stored in an airtight container in the refrigerator for up to 3 days. Reheat in the oven at 350°F until warm throughout. For longer storage, consider freezing the dip. Place it in a freezer-safe container and it will keep for up to 3 months. Thaw in the refrigerator before reheating.
Helpful Q&A
Can I make Buffalo Chicken Dip ahead of time?
Absolutely! Prepare the dip up to the baking stage, cover it tightly, and store it in the fridge for up to 24 hours. When you’re ready to serve, just pop it in the oven until bubbly.
How do I know when the dip is done?
The dip is ready when it’s hot throughout and the cheese on top is melted and bubbly. A light golden color indicates it’s perfectly baked.
Can I use a slow cooker for this recipe?
Yes! Combine all the ingredients in a slow cooker and cook on low for about 2 hours, stirring occasionally, until heated through and melted.
What can I serve with Buffalo Chicken Dip?
Serve it with celery sticks, carrot sticks, tortilla chips, or pita chips. It’s also delicious with crackers or toasted bread!
You Might Also Like
Bring It Home
When it comes to hosting or simply enjoying a night in, this Buffalo Chicken Dip (No Ranch) Recipe is a must-try. It’s easy to make, packed with flavor, and sure to impress anyone who takes a bite. Whether you’re dunking celery sticks or chips, each scoop is a delightful explosion of taste. So gather your ingredients, follow the steps, and get ready to enjoy one of the best dips you’ll ever make!
Buffalo Chicken Dip (No Ranch) Recipe
Ingredients
Equipment
Method
- Step 1: Preheat your oven to 350°F (175°C).
- Step 2: In a large mixing bowl, combine the softened cream cheese and red hot sauce until smooth.
- Step 3: Fold in the cooked chicken cubes until well coated.
- Step 4: Add in three-quarters of the shredded cheddar and all of the crumbled blue cheese, stirring until well mixed.
- Step 5: Spoon the mixture into a baking dish, spreading it out evenly.
- Step 6: Sprinkle the remaining shredded cheddar cheese on top.
- Step 7: Bake for 20-25 minutes, or until bubbly and cheese is melted.
- Step 8: Garnish with chopped scallions if desired and serve hot.
Notes
- Store leftovers in an airtight container in the fridge for up to 3 days.
- For longer storage, freeze in a freezer-safe container for up to 3 months.
- You can make it ahead of time and bake it just before serving.