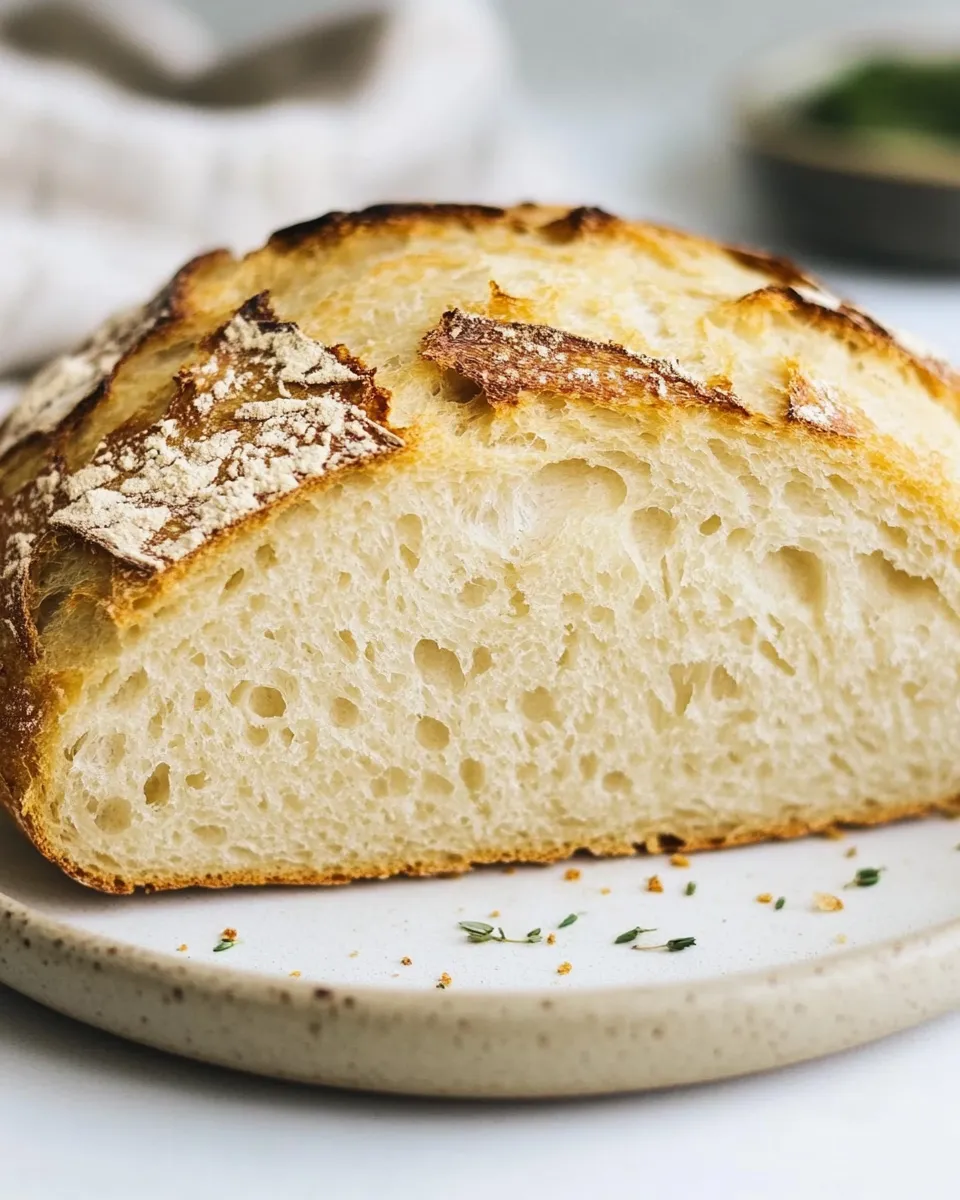
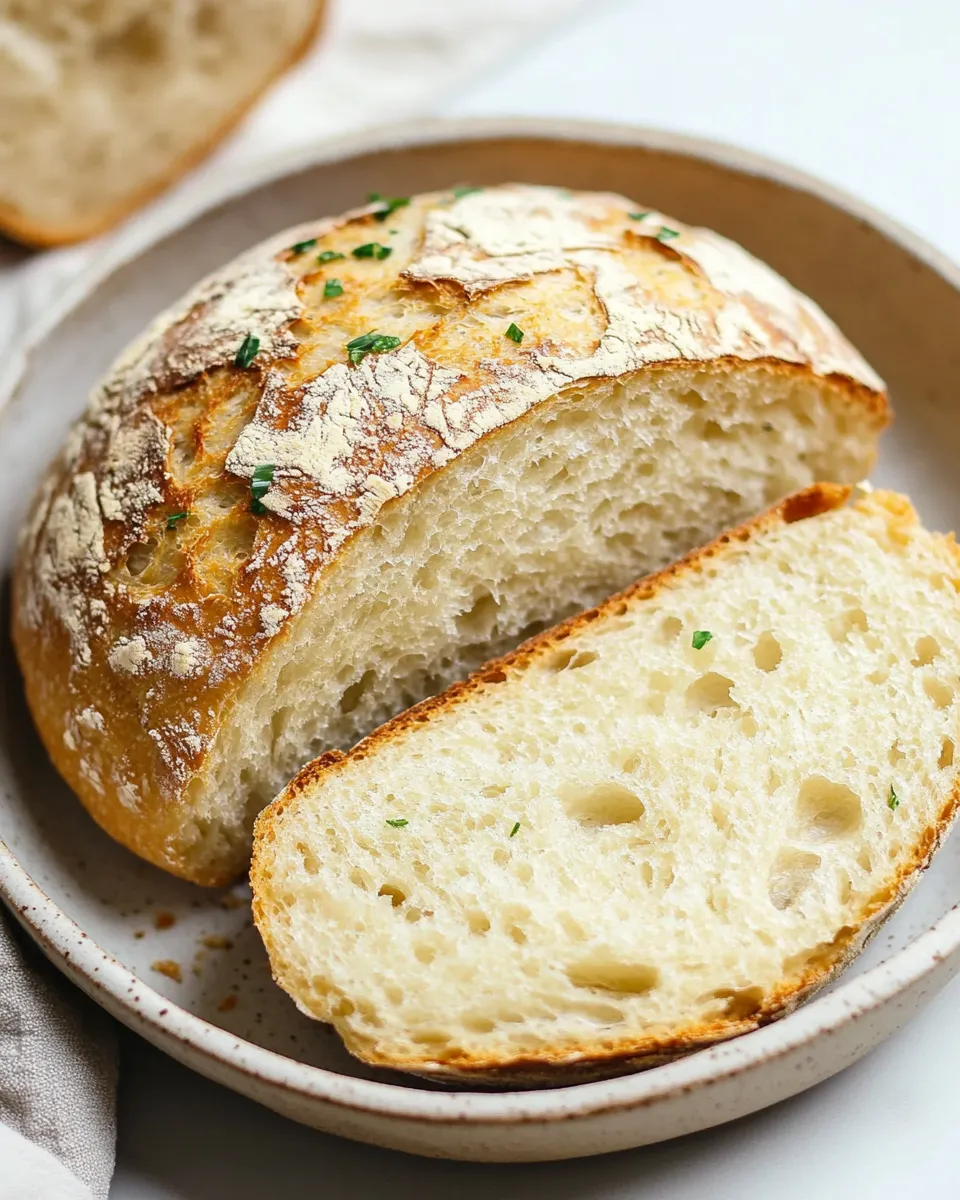
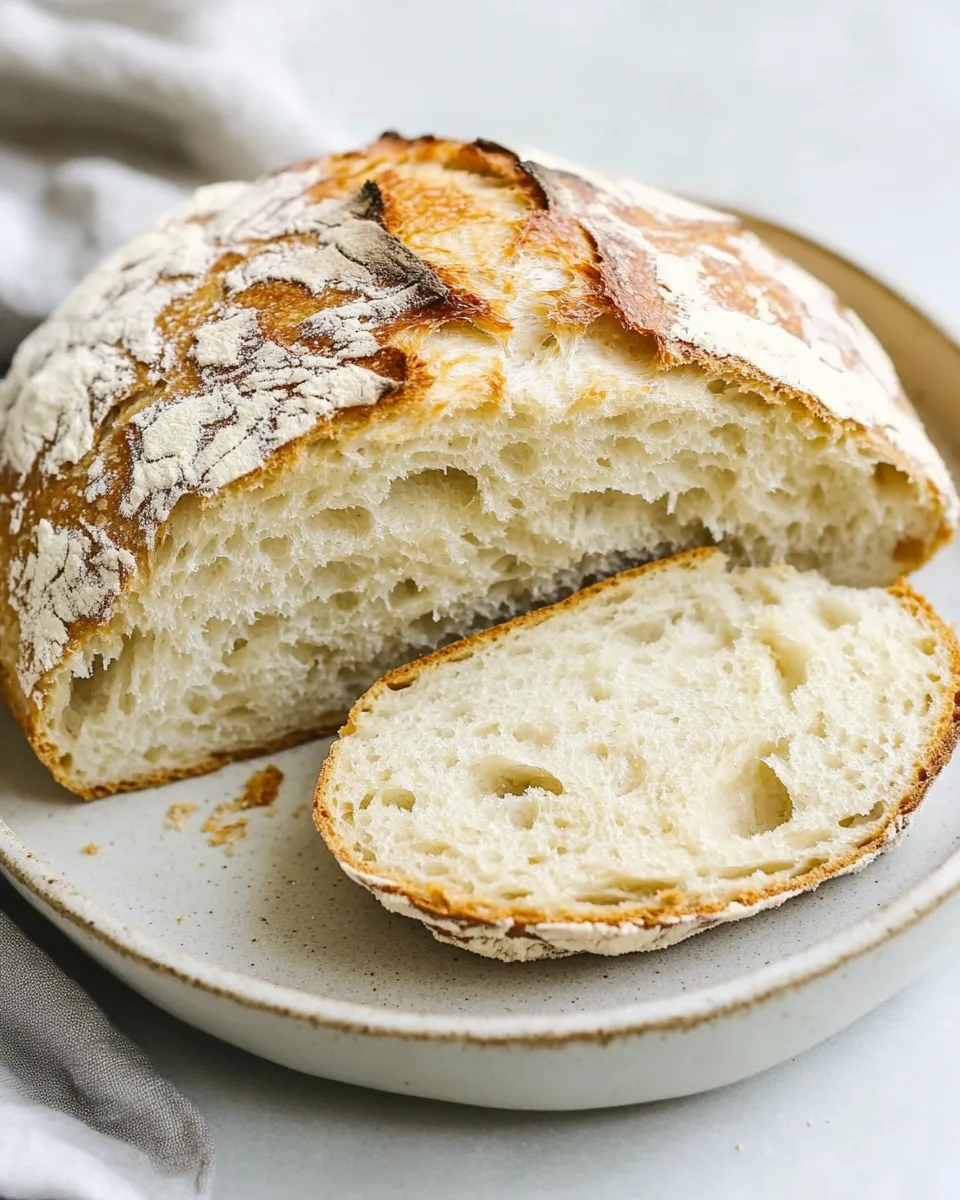
Miracle No Knead Bread
If you’ve ever longed for the warm, comforting aroma of freshly baked bread wafting through your home, but felt intimidated by the thought of kneading and perfecting dough, then let me introduce you to the world of Miracle No Knead Bread. This incredibly simple recipe yields a crusty, artisan-style loaf that looks and tastes as though you’ve just pulled it from a quaint bakery. With just four basic ingredients, you’ll be amazed at how easy it is to create a loaf that will delight your family and friends.
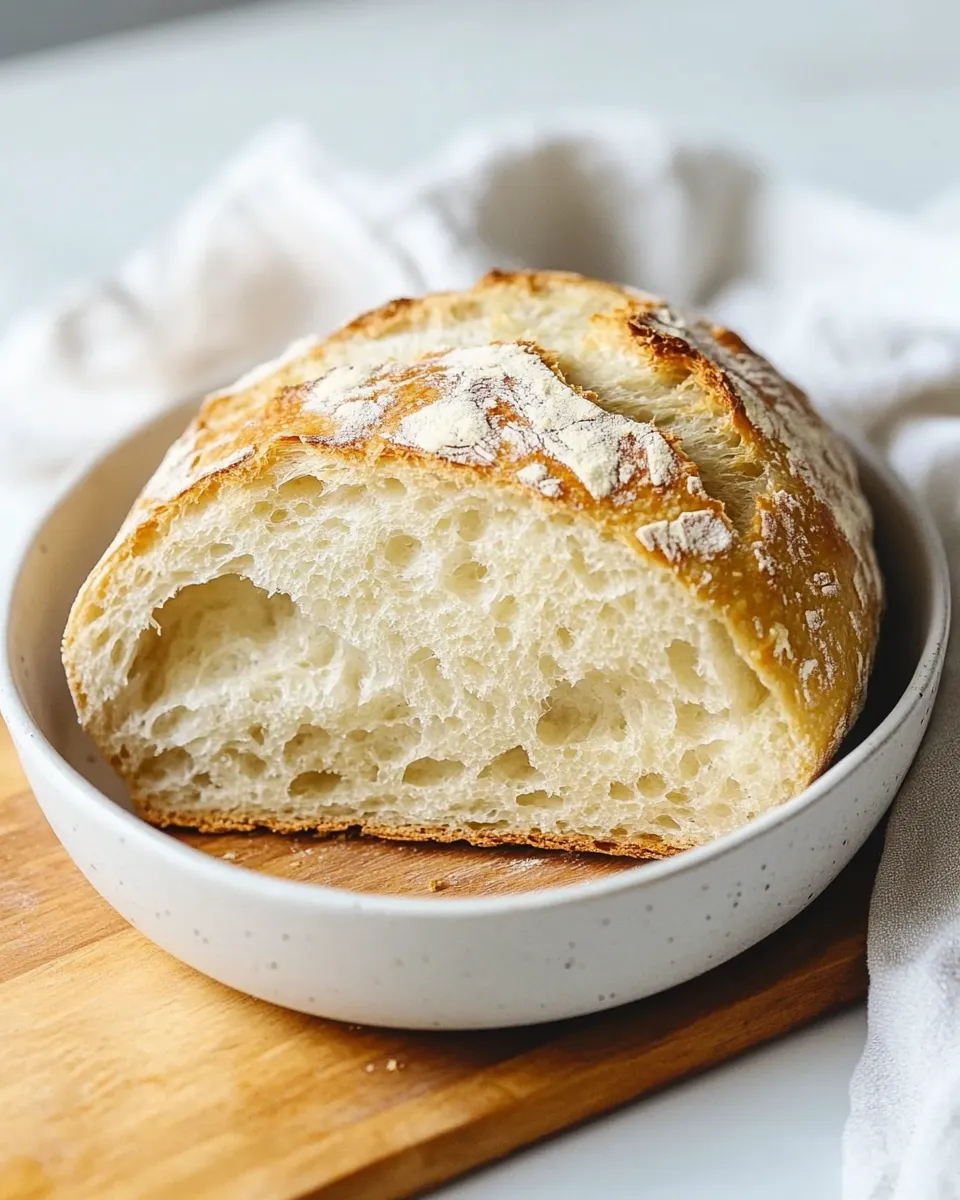
Imagine slicing into a warm, golden crust to reveal a soft, airy interior, perfect for slathering with butter or dipping into your favorite soup. The best part? This recipe requires no special skills, no fancy ingredients, and absolutely no kneading! Just a bit of patience while the dough does its thing. Let’s dive in!
Reasons to Love Miracle No Knead Bread
- Simplicity: With only four ingredients, this recipe is incredibly straightforward.
- No Kneading Required: Say goodbye to the hard work of kneading dough. This bread rises beautifully on its own.
- Versatility: You can easily customize it with herbs, cheese, or seeds for a unique twist.
- Perfect for Beginners: If you’re new to baking, this recipe is a fantastic starting point.
- Impressive Results: The crusty exterior and airy interior will impress anyone who tastes it.
What You’ll Gather
- 3 cups all-purpose flour: This forms the base of your dough.
- 1 ¾ teaspoons coarse sea salt: Enhances flavor and strengthens the dough structure.
- ½ teaspoon active dry yeast: The leavening agent that makes the bread rise.
- 1 ½ cups warm water: Activates the yeast and hydrates the flour.
Tools & Equipment Needed
- Large mixing bowl: For combining your ingredients.
- Spoon or spatula: To mix the dough together.
- Plastic wrap or kitchen towel: To cover the bowl while the dough rises.
- Dutch oven or heavy oven-safe pot: For baking the bread, which helps create steam for a crusty loaf.
- Parchment paper (optional): Makes transferring the dough easier.
Miracle No Knead Bread: Step-by-Step Guide
Step 1: Combine Ingredients
In a large mixing bowl, combine the 3 cups of all-purpose flour, 1 ¾ teaspoons of coarse sea salt, and ½ teaspoon of active dry yeast. Stir together until well mixed.
Step 2: Add Water
Pour in the 1 ½ cups of warm water. Using a spoon or spatula, mix until the flour is fully incorporated, and a shaggy dough forms. Don’t worry about any lumps; they will work themselves out during the rising process.
Step 3: Cover and Let Rise
Cover the bowl with plastic wrap or a kitchen towel and let the dough rise at room temperature for 12 to 18 hours. This long fermentation is what develops the flavor and texture of the bread.
Step 4: Prepare for Baking
After the dough has risen and doubled in size, turn it out onto a well-floured surface. With floured hands, gently shape the dough into a ball. Don’t worry about perfection; a rustic shape is part of the charm!
Step 5: Second Rise
Place the dough seam side down on a piece of parchment paper. Cover it with a towel and let it rest for about 1 hour while you preheat your oven.
Step 6: Preheat Oven and Dutch Oven
Preheat your oven to 450°F (230°C). Place your Dutch oven (with the lid on) in the oven to heat up for about 30 minutes.
Step 7: Bake the Bread
Once preheated, carefully remove the Dutch oven from the oven. Use the parchment paper to lift the dough and gently place it into the pot. Cover with the lid and bake for 30 minutes.
Step 8: Finish Baking
After 30 minutes, remove the lid and bake for an additional 15-20 minutes, or until the bread is golden brown and has a hollow sound when tapped on the bottom.
Step 9: Cool and Enjoy
Remove the bread from the pot and let it cool on a wire rack for at least 30 minutes before slicing. This step is essential for the texture!
Spring–Summer–Fall–Winter Ideas
- Spring: Pair with fresh spring greens and a herb-infused olive oil for dipping.
- Summer: Use slices for bruschetta topped with ripe tomatoes and basil.
- Fall: Serve alongside hearty soups or stews as the weather cools.
- Winter: Enjoy with warm butter and jam for a comforting breakfast.
Frequent Missteps to Avoid
Even the simplest recipes can have their pitfalls. Here are some common mistakes to watch out for:
- Not using enough salt: Salt is crucial for flavor and dough structure.
- Skipping the rise time: Patience is key; don’t rush the fermentation process.
- Overbaking: Keep an eye on the bread during the final bake to avoid a burnt crust.
- Too little water: The dough should be wet and sticky for the best results.
Refrigerate, Freeze, Reheat
To store your Miracle No Knead Bread, follow these tips:
- Refrigerate: Wrap in plastic wrap or place in a plastic bag for up to three days.
- Freeze: Slice the bread and wrap it tightly in foil or freezer bags for up to three months.
- Reheat: To refresh, place in a preheated oven at 350°F (175°C) for about 10 minutes.
Reader Questions
Can I use whole wheat flour instead of all-purpose flour?
Yes! You can substitute whole wheat flour, but it may result in a denser loaf. You may need to adjust the water slightly, as whole wheat flour absorbs more moisture.
What if my dough doesn’t rise?
Ensure your yeast is fresh and active. If your kitchen is cold, try placing the dough in a warmer spot or extending the rise time.
Can I add herbs or cheese to the dough?
Absolutely! Feel free to mix in your favorite herbs, cheese, or even garlic for added flavor before the first rise.
How can I tell when the bread is done baking?
The bread is done when it is golden brown and sounds hollow when tapped on the bottom. A kitchen thermometer should read around 200°F (93°C) in the center.
More from the Kitchen
- Classic Homemade Pizza Dough
- Cheesy Garlic Breadsticks
- Herbed Focaccia Recipe
- Easy Artisan Flatbread
The Takeaway
In a world filled with complicated recipes, Miracle No Knead Bread stands out as an extraordinary example of how simple ingredients and minimal effort can yield something truly special. With its crusty exterior and soft, chewy interior, this bread is perfect for any occasion, whether it’s a casual family dinner or a fancy gathering.
So, gather your ingredients, set aside some time for the dough to work its magic, and prepare to impress yourself and your loved ones with a homemade loaf that rivals anything you’d find in a bakery. Happy baking!
Miracle No Knead Bread
Ingredients
Equipment
Method
- Step 1: Combine Ingredients: In a large mixing bowl, combine the 3 cups of all-purpose flour, 1 ¾ teaspoons of coarse sea salt, and ½ teaspoon of active dry yeast. Stir together until well mixed.
- Step 2: Add Water: Pour in the 1 ½ cups of warm water. Using a spoon or spatula, mix until the flour is fully incorporated, and a shaggy dough forms.
- Step 3: Cover and Let Rise: Cover the bowl with plastic wrap or a kitchen towel and let the dough rise at room temperature for 12 to 18 hours.
- Step 4: Prepare for Baking: After the dough has risen and doubled in size, turn it out onto a well-floured surface and shape into a ball.
- Step 5: Second Rise: Place the dough seam side down on a piece of parchment paper. Cover it with a towel and let it rest for about 1 hour.
- Step 6: Preheat Oven and Dutch Oven: Preheat your oven to 450°F (230°C). Place your Dutch oven in the oven to heat up for about 30 minutes.
- Step 7: Bake the Bread: Carefully remove the Dutch oven. Use the parchment paper to lift the dough and place it into the pot. Cover with the lid and bake for 30 minutes.
- Step 8: Finish Baking: After 30 minutes, remove the lid and bake for an additional 15-20 minutes, or until golden brown.
- Step 9: Cool and Enjoy: Remove the bread from the pot and let it cool on a wire rack for at least 30 minutes before slicing.
Notes
- For a more flavorful bread, try adding herbs or cheese to the dough.
- Make sure your yeast is fresh for the best rise.
- Let the bread cool completely before slicing for the best texture.