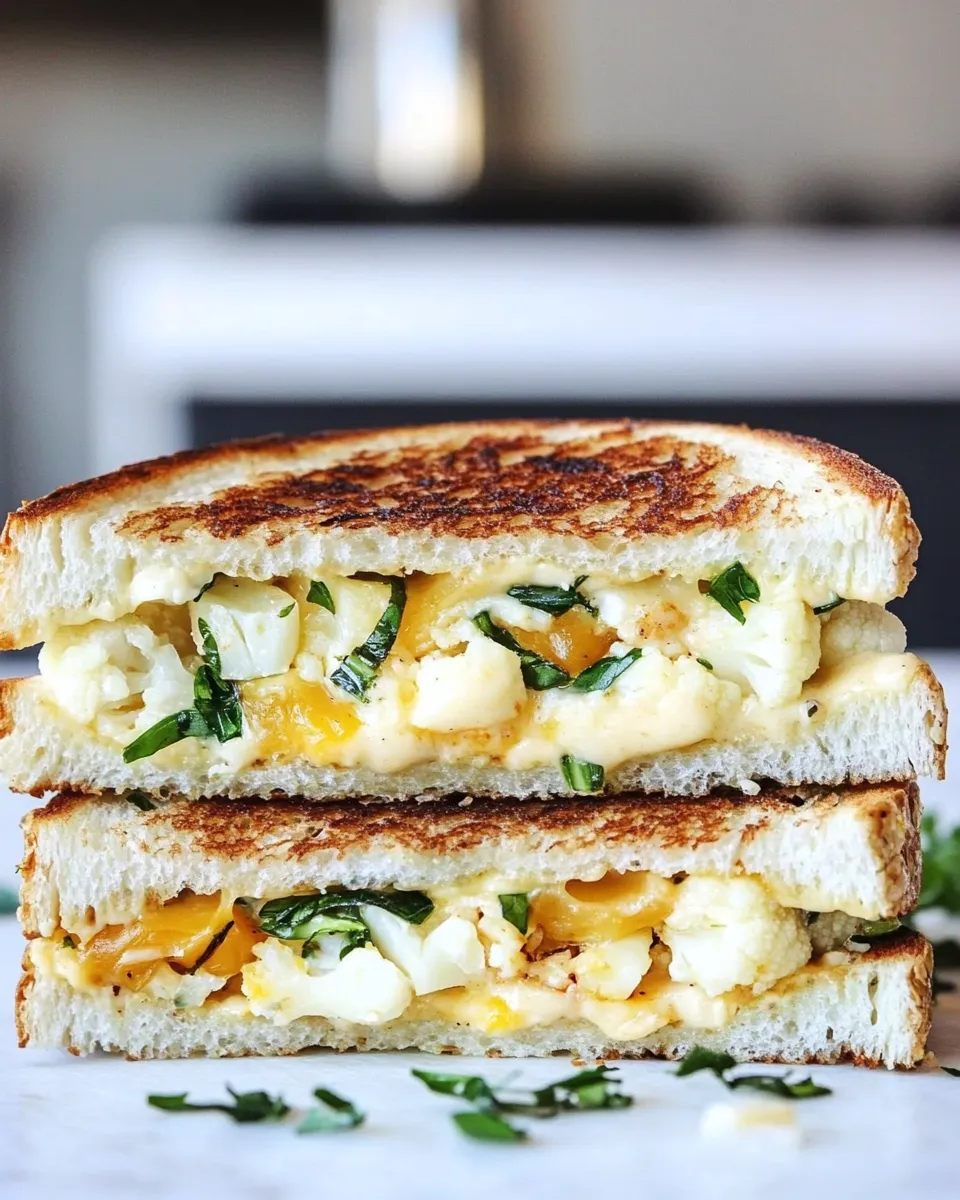
Roasted Cauliflower Grilled Cheese
When it comes to comfort food, grilled cheese sandwiches hold a special place in our hearts. They evoke memories of childhood, cozy dinners, and the simple joy of melted cheese between crispy bread. But what if we could elevate this classic dish with a twist? Enter the Roasted Cauliflower Grilled Cheese! This delightful recipe combines the earthy flavor of roasted cauliflower with rich, creamy cheeses and a touch of arugula for freshness. Let’s dive into this mouthwatering creation that will have you craving more with every bite.
Top Reasons to Make Roasted Cauliflower Grilled Cheese
- Delicious Comfort Food: This grilled cheese is a warm, satisfying meal that’s perfect for any day of the week.
- Nutritious Twist: By incorporating roasted cauliflower, you add fiber and nutrients, making this dish more wholesome.
- Easy to Customize: You can swap out cheeses or add additional toppings based on your preferences.
- Perfect for Meal Prep: This recipe is great for making ahead, allowing you to enjoy it whenever you crave a cheesy delight.
- Vegetarian-Friendly: A great option for those looking to enjoy a meatless meal without sacrificing flavor.
Your Shopping Guide
- Cauliflower: Look for a small head, firm and with tightly packed florets.
- Yellow Onion: A small onion will add sweetness and depth to the flavor.
- Olive Oil: Extra virgin is preferred for its rich flavor.
- Whole-Grain Bread: Choose a hearty variety, such as Eureka! Organic Bread, for added texture and nutrition.
- Gouda Cheese: Arla Dofino Gouda offers a nutty flavor that pairs perfectly with the cauliflower.
- Havarti Cheese: Arla Dofino Creamy Havarti adds creaminess and a mild flavor.
- Baby Arugula: For a peppery kick and a fresh touch.
- Light Mayonnaise: Used in the spread for a creamy texture.
- Garlic: Fresh minced garlic enhances the flavor profile.
- Whole Grain Mustard: Adds a tangy depth to the spread.
- Lemon Juice: Brightens the dish with its acidity.
- Salt and Pepper: Essential for seasoning your dish to perfection.
What’s in the Gear List
- Roasting Pan: For perfectly roasted cauliflower and onions.
- Skillet: A non-stick skillet works best for grilling the sandwiches.
- Spatula: To flip your sandwiches without any fuss.
- Knife and Cutting Board: For slicing your ingredients easily.
- Mixing Bowl: To combine the mayonnaise spread ingredients.
Roasted Cauliflower Grilled Cheese: From Prep to Plate

Step 1: Roast the Vegetables
Start by preheating your oven to 425°F (220°C). Slice the head of cauliflower into flat, 3/8-inch-thick pieces. Slice the yellow onion into 1/4-inch-thick rounds. On a roasting pan, toss the cauliflower and onion with 1 tablespoon of olive oil, salt, and freshly ground black pepper to taste. Spread them out in a single layer and roast for about 20-25 minutes, or until they are tender and slightly caramelized.
Step 2: Prepare the Cheese Spread
While the vegetables are roasting, prepare your cheesy spread. In a mixing bowl, combine 1/4 cup of light mayonnaise, 1 minced garlic clove, 2 teaspoons of whole grain mustard, and 2 teaspoons of fresh lemon juice. Season with salt and freshly ground black pepper to taste. Mix well until all ingredients are combined.
Step 3: Assemble the Sandwiches
Spread a generous layer of the mayonnaise mixture on one side of each slice of whole-grain bread. On the non-spread side, layer the roasted cauliflower and onion, followed by a slice of Arla Dofino Gouda and a slice of Arla Dofino Creamy Havarti cheese. Top with a handful of baby arugula before placing another slice of bread on top, spread side facing out.
Step 4: Grill the Sandwiches
In a non-stick skillet over medium heat, melt 1 tablespoon of softened butter. Once the butter is melted and bubbling, add the assembled sandwiches. Grill for about 3-4 minutes on each side, or until the bread is golden brown and the cheese is melting. Keep an eye on them to prevent burning!
Step 5: Serve and Enjoy
Once your sandwiches are perfectly grilled, remove them from the skillet and let them cool for a minute before slicing. Serve warm with your favorite soup or a side salad for a complete meal. Enjoy the gooey, cheesy goodness!
Make It Year-Round

- Seasonal Variations: Try swapping out roasted vegetables according to the season, such as zucchini in summer or butternut squash in fall.
- Cheese Options: Experiment with different cheese varieties like cheddar or pepper jack for a spicy kick.
- Herbs and Spices: Add fresh herbs such as thyme or rosemary for an aromatic touch.
- Accompaniments: Pair with seasonal dips or sauces for a unique flavor experience.
Troubles You Can Avoid
- Overcooking the Cauliflower: Keep an eye on the roasting time to ensure it’s tender but not mushy.
- Uneven Grilling: Make sure to use medium heat to allow the cheese to melt while the bread browns evenly.
- Too Much Spread: A thin layer of the mayonnaise mixture is all you need to avoid sogginess.
- Skipping Seasoning: Don’t forget to season every layer for maximum flavor!
Save for Later: Storage Tips
If you have leftovers or want to prepare these sandwiches in advance, here are some storage tips:
- Refrigeration: Store any leftover sandwiches in an airtight container in the fridge for up to 2 days.
- Freezing: To freeze, wrap each sandwich tightly in plastic wrap and then foil. They can be frozen for up to 1 month.
- Reheating: To reheat, use a skillet over low heat to gently warm the sandwiches until the cheese is melted and the bread is crispy.
Common Questions
Can I use other vegetables?
Absolutely! Feel free to mix in other roasted vegetables like bell peppers, mushrooms, or spinach for added flavor and nutrition.
What type of bread works best?
Whole-grain bread is ideal for this recipe, but you can also use sourdough or rye for a different flavor profile.
Is there a vegan option for this recipe?
Yes! You can replace the cheeses with vegan cheese alternatives and use a plant-based mayonnaise for the spread.
Can I make this sandwich gluten-free?
Definitely! Simply substitute the whole-grain bread with a gluten-free bread of your choice.
Weekend Projects
Before You Go
The Roasted Cauliflower Grilled Cheese is not just a trendy take on a classic; it’s a deliciously satisfying meal that brings together the best of comfort food and health-conscious eating. With its layers of flavor and creamy textures, this recipe will quickly become a favorite in your household. Whether for a cozy lunch or a quick weeknight dinner, this grilled cheese is your ticket to a truly delightful experience. So gather your ingredients, roll up your sleeves, and get ready to enjoy a sandwich that will warm your heart and fill your belly!
Incorporate this Roasted Cauliflower Grilled Cheese into your meal rotation, and you’ll savor every bite while feeling good about your choices. Happy cooking!

Roasted Cauliflower Grilled Cheese
Ingredients
Equipment
Method
- Preheat your oven to 425°F (220°C). Slice the head of cauliflower into flat, 3/8-inch-thick pieces. Slice the yellow onion into 1/4-inch-thick rounds. On a roasting pan, toss the cauliflower and onion with olive oil, salt, and pepper. Spread them out in a single layer and roast for about 20-25 minutes, until tender and slightly caramelized.
- While the vegetables are roasting, prepare your cheesy spread. In a mixing bowl, combine mayonnaise, minced garlic, whole grain mustard, and lemon juice. Season with salt and pepper to taste. Mix well until all ingredients are combined.
- Spread a generous layer of the mayonnaise mixture on one side of each slice of whole-grain bread. On the non-spread side, layer the roasted cauliflower and onion, followed by a slice of Gouda and a slice of Havarti cheese. Top with baby arugula before placing another slice of bread on top, spread side facing out.
- In a non-stick skillet over medium heat, melt butter. Add the assembled sandwiches and grill for about 3-4 minutes on each side, or until the bread is golden brown and the cheese is melting. Keep an eye to prevent burning!
- Once grilled, remove the sandwiches and let cool for a minute before slicing. Serve warm with soup or a side salad. Enjoy!
Notes
- For a spicy kick, try using pepper jack cheese.
- Feel free to substitute other seasonal vegetables like zucchini or butternut squash.
- Store leftovers in an airtight container in the fridge for up to 2 days.