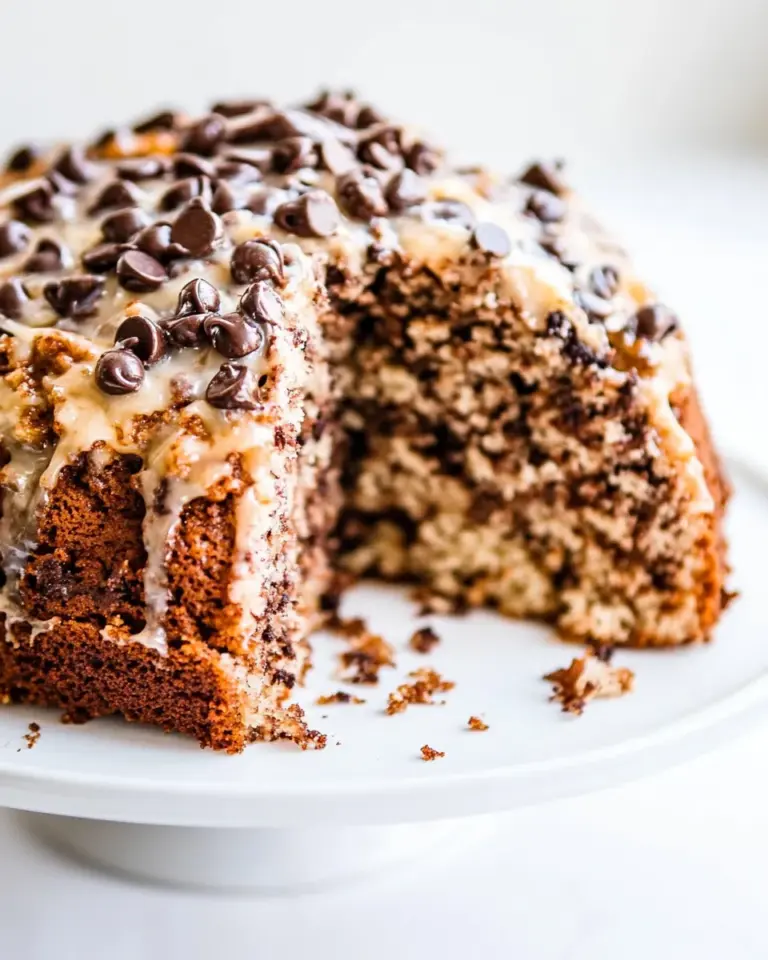
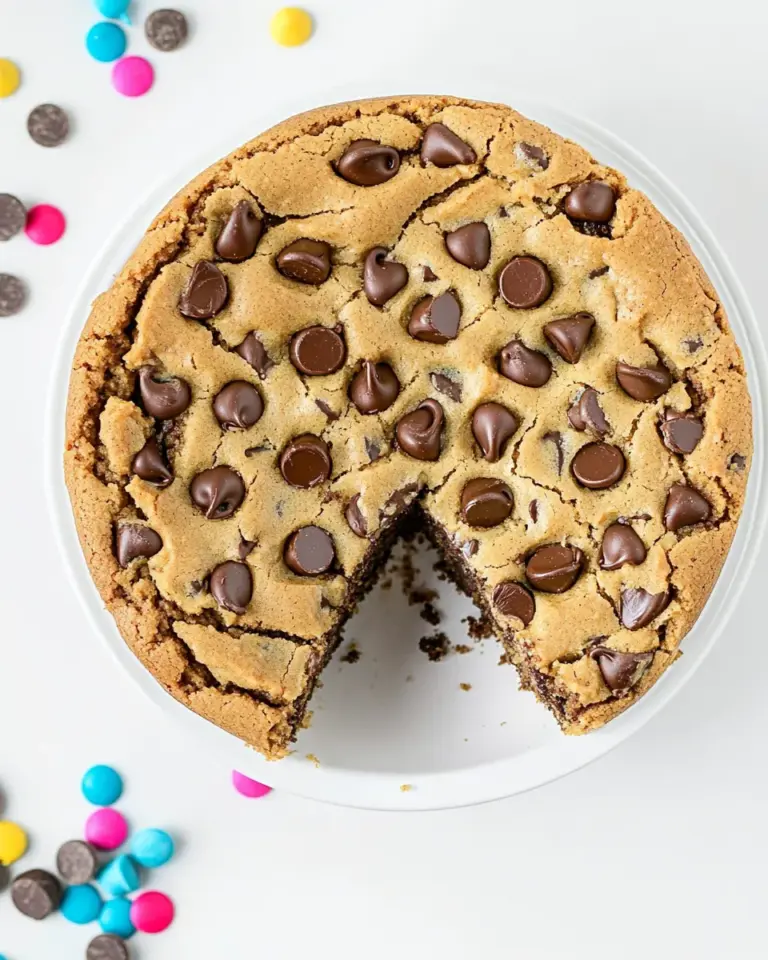
Loaded Candy Cookie Bars
If you’re on the lookout for a dessert that screams indulgence in every bite, look no further than these Loaded Candy Cookie Bars. Perfectly chewy, deeply satisfying, and loaded with delightful surprises, these bars combine the classic comfort of cookies with the fun of candy. Chocolate lovers, rejoice! This recipe will have you whipping up a delicious treat that everyone will rave about. Whether you’re preparing for a party, a family gathering, or just a cozy night in, these Loaded Candy Cookie Bars will elevate your dessert game to new heights!
Why Cooks Rave About It

These Loaded Candy Cookie Bars are a hit for several reasons. First, they are incredibly versatile. You can easily swap out the candies based on your preferences or what you have on hand. Second, the combination of textures—chewy cookie, creamy chocolate, and fluffy marshmallows—is simply irresistible. Lastly, this recipe is straightforward and requires no special baking skills. Just mix, bake, and enjoy—perfect for both novice bakers and seasoned pros alike!
What You’ll Need
- 2 1/4 cups all-purpose flour
- 2 1/4 teaspoons baking powder
- 1 teaspoon coarse salt
- 1/2 cup (1 stick) unsalted butter, room temperature
- 1 1/2 cups packed light brown sugar
- 3 large eggs
- 1 teaspoon pure vanilla extract
- 1 cup chopped Cadbury Mini Eggs (Royal Dark or Milk Chocolate)
- 1 cup miniature marshmallows
- 1 cup dark chocolate chips
- 1 cup white chocolate, coarsely chopped
Gear Up: What to Grab
- Mixing Bowls: Use various sizes for mixing dry and wet ingredients separately.
- Hand Mixer or Stand Mixer: A hand mixer makes it easy to cream the butter and sugar.
- Rubber Spatula: Perfect for folding in the candy and marshmallows without crushing them.
- Baking Pan: A 9×13-inch pan works best for these cookie bars.
- Parchment Paper: Line your pan for easy removal and cleanup.
Directions: Loaded Candy Cookie Bars

Step 1: Preheat Your Oven
Begin by preheating your oven to 350°F (175°C). This ensures that your Loaded Candy Cookie Bars bake evenly.
Step 2: Prepare Your Baking Pan
Line a 9×13-inch baking pan with parchment paper, leaving some overhang on the sides. This will make it easier to lift the bars out later.
Step 3: Mix the Dry Ingredients
In a medium bowl, whisk together the all-purpose flour, baking powder, and coarse salt. Set this mixture aside.
Step 4: Cream the Butter and Sugar
In a large mixing bowl, beat together the room temperature butter and packed light brown sugar until the mixture is light and fluffy. This usually takes about 2-3 minutes with a hand mixer.
Step 5: Add the Eggs and Vanilla
Add the eggs, one at a time, mixing well after each addition. Then stir in the pure vanilla extract until everything is well combined.
Step 6: Combine Wet and Dry Mixtures
Gradually add the dry ingredient mixture to the wet ingredients, mixing until just combined. Be careful not to overmix.
Step 7: Fold in the Goodies
Now it’s time to fold in the fun! Gently mix in 3/4 cup of the chopped Cadbury Mini Eggs, 3/4 cup of miniature marshmallows, 3/4 cup of dark chocolate chips, and 3/4 cup of coarsely chopped white chocolate. The dough will be thick and loaded with goodies!
Step 8: Spread and Bake
Spread the cookie dough evenly in your prepared baking pan. Bake for 25-30 minutes, or until the edges are golden brown and a toothpick inserted in the center comes out with a few moist crumbs.
Step 9: Cool and Cut
Once baked, remove the pan from the oven and allow it to cool in the pan for about 15 minutes. Then, using the parchment paper overhang, lift the bars out of the pan and let them cool completely on a wire rack. Once cool, cut into squares and enjoy!
Seasonal Serving Ideas

- For Easter, use pastel-colored candies or additional mini eggs for a festive touch.
- During the winter holidays, incorporate peppermint candies for a seasonal twist.
- Serve warm with a scoop of vanilla ice cream for a delightful dessert.
- Package them up in festive boxes as homemade gifts for friends and family.
What Could Go Wrong
Even though these Loaded Candy Cookie Bars are straightforward to make, a few things can go awry:
- Overmixing: This can lead to tough bars, so mix until just combined.
- Underbaking: Ensure they are baked until the edges are golden; otherwise, they may be too gooey.
- Incorrect Measurements: Baking is a science, so accurate measurements are crucial for the perfect texture.
- Not Cooling: Cutting them too early can result in messy bars; allow them to cool completely.
Make Ahead Like a Pro
These Loaded Candy Cookie Bars are perfect for making ahead of time. You can prepare the dough and store it in the refrigerator for up to 24 hours before baking. Alternatively, once baked and cooled, store the bars in an airtight container at room temperature for up to a week. They also freeze well—just wrap them tightly in plastic wrap and store them in a freezer-safe container for up to three months. When ready to enjoy, let them thaw at room temperature or warm them slightly in the oven.
Common Questions
Can I use different types of chocolate?
Absolutely! Feel free to mix and match your favorite chocolates. Milk chocolate, white chocolate, or even butterscotch chips would work wonderfully in these Loaded Candy Cookie Bars.
How do I store leftovers?
Store any leftover Loaded Candy Cookie Bars in an airtight container at room temperature for up to a week. They can also be refrigerated for longer freshness.
Can I add nuts to the recipe?
Yes! Chopped nuts like walnuts or pecans would add a delightful crunch to the bars. Just be sure to adjust the amount of candy accordingly to maintain the balance of flavors.
What should I do if my bars are too crumbly?
If your Loaded Candy Cookie Bars turn out crumbly, it may be due to overbaking or not enough moisture in the dough. Ensure you follow the baking time closely and consider adding a bit more butter or an extra egg for moisture next time.
You Might Also Like
- Classic Chocolate Chip Cookies
- One-Bowl Brownies
- Vegan Gluten-Free Chocolate Chip Cookies
- Peanut Butter Blondies
Next Steps
Now that you’ve mastered the art of making Loaded Candy Cookie Bars, it’s time to get baking! Gather your ingredients, preheat that oven, and let the magic happen. These bars are not only delicious but also a great way to involve friends and family in the kitchen. So roll up your sleeves, and enjoy the sweet satisfaction of creating something delightful that everyone will love. Whether for a special occasion or a simple treat, these Loaded Candy Cookie Bars are bound to become a favorite in your baking repertoire. Happy baking!

Loaded Candy Cookie Bars
Ingredients
Equipment
Method
- Step 1: Preheat Your Oven. Begin by preheating your oven to 350°F (175°C). This ensures that your Loaded Candy Cookie Bars bake evenly.
- Step 2: Prepare Your Baking Pan. Line a 9x13-inch baking pan with parchment paper, leaving some overhang on the sides. This will make it easier to lift the bars out later.
- Step 3: Mix the Dry Ingredients. In a medium bowl, whisk together the all-purpose flour, baking powder, and coarse salt. Set this mixture aside.
- Step 4: Cream the Butter and Sugar. In a large mixing bowl, beat together the room temperature butter and packed light brown sugar until the mixture is light and fluffy. This usually takes about 2-3 minutes with a hand mixer.
- Step 5: Add the Eggs and Vanilla. Add the eggs, one at a time, mixing well after each addition. Then stir in the pure vanilla extract until everything is well combined.
- Step 6: Combine Wet and Dry Mixtures. Gradually add the dry ingredient mixture to the wet ingredients, mixing until just combined. Be careful not to overmix.
- Step 7: Fold in the Goodies. Now it’s time to fold in the fun! Gently mix in 3/4 cup of the chopped Cadbury Mini Eggs, 3/4 cup of miniature marshmallows, 3/4 cup of dark chocolate chips, and 3/4 cup of coarsely chopped white chocolate. The dough will be thick and loaded with goodies!
- Step 8: Spread and Bake. Spread the cookie dough evenly in your prepared baking pan. Bake for 25-30 minutes, or until the edges are golden brown and a toothpick inserted in the center comes out with a few moist crumbs.
- Step 9: Cool and Cut. Once baked, remove the pan from the oven and allow it to cool in the pan for about 15 minutes. Then, using the parchment paper overhang, lift the bars out of the pan and let them cool completely on a wire rack. Once cool, cut into squares and enjoy!
Notes
- These Loaded Candy Cookie Bars can be made ahead of time and stored in an airtight container for up to a week.
- Feel free to use different types of chocolate or add nuts for extra texture.
- For festive occasions, try using pastel-colored candies or peppermint for a seasonal twist.