Homemade Lox Recipe
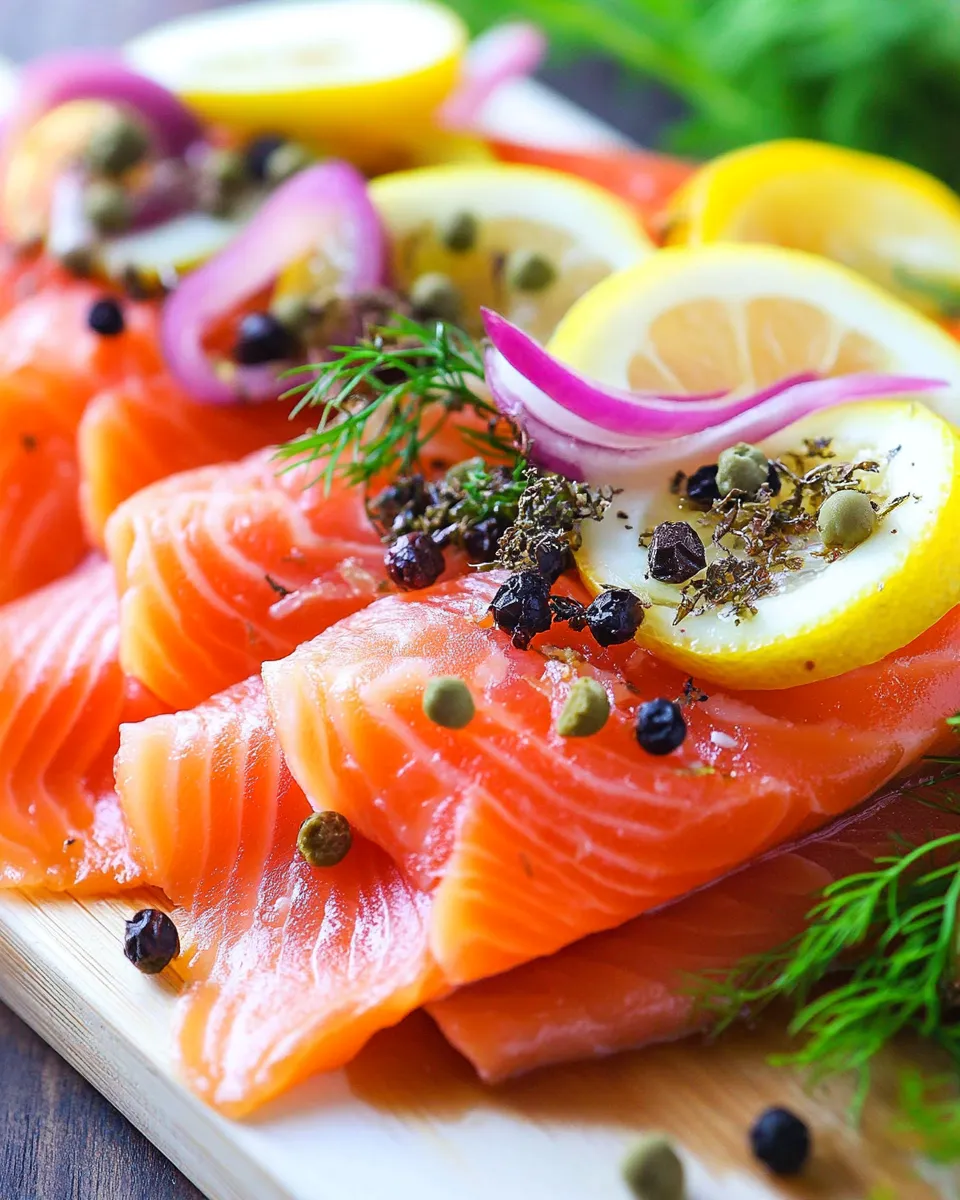
If you’ve ever tasted the silky, rich flavor of lox, you know it’s a true delicacy. This Homemade Lox Recipe will elevate your brunch game and impress your friends and family. Using a thick belly cut of salmon, this recipe is simple yet rewarding, allowing you to transform a fresh salmon fillet into a gourmet treat in just a few days. Let’s dive into the details of making your very own lox at home.
Why This Recipe Is Reliable
This Homemade Lox Recipe is tried and tested, ensuring you achieve delicious results every time. The combination of sugar, salt, and spices results in a perfectly balanced curing process that enhances the natural flavors of the salmon. With just a few ingredients and minimal effort, you can enjoy the rich, buttery taste of homemade lox that rivals any store-bought version.
What to Buy
When preparing your lox, sourcing high-quality ingredients is essential for the best flavor. Here’s what you’ll need:
- 4-pound thick belly cut salmon fillet: Look for fresh, sushi-grade salmon from a reputable fishmonger.
- 1 cup granulated sugar: This will help create a sweet balance to the salty cure.
- 1 cup kosher salt or sea salt: Choose a coarse type for effective curing.
- 2 tablespoons coarsely ground multi-color peppercorns: This adds a delightful kick and visual appeal.
- 1 teaspoon liquid smoke: Provides a hint of smokiness that enhances the flavor.
- 2 cups fresh dill, finely chopped: Fresh herbs are key for that signature taste.
- 1/2 teaspoon chili pepper flakes: For a subtle heat that complements the salmon.
Tools & Equipment Needed
Before you get started, make sure you have the following tools:
- Baking dish: A glass or ceramic dish works best for marinating.
- Parchment paper: Helps keep the salmon moist and prevents sticking.
- Plastic wrap: Essential for tightly wrapping the salmon during the curing process.
- Sharp knife: For slicing the finished lox into delicate pieces.
- Cutting board: A sturdy surface for prepping and slicing.
Homemade Lox Recipe Cooking Guide
Follow this step-by-step guide to create your Homemade Lox Recipe masterpiece:
Step 1: Prepare the Cure Mixture
In a medium bowl, combine the granulated sugar, kosher salt, and coarsely ground multi-color peppercorns. Mix well until all ingredients are evenly distributed.
Step 2: Add Flavor Enhancements
Stir in the liquid smoke, finely chopped dill, and chili pepper flakes to the cure mixture. This is where the magic happens, infusing the salmon with flavor.
Step 3: Prepare the Salmon
Place the salmon fillet skin-side down in a glass baking dish. Make sure it fits snugly without overlapping. This will help the curing process.
Step 4: Apply the Cure
Generously sprinkle the cure mixture evenly over the salmon, ensuring every inch is covered. Press down gently to help the cure adhere to the fish.
Step 5: Wrap and Weigh Down
Cover the salmon with parchment paper and then wrap it tightly with plastic wrap. Place a weight (like canned goods) on top to help compress the salmon during curing.
Step 6: Cure the Salmon
Refrigerate the salmon for 48 to 72 hours. Check it daily; the longer it cures, the firmer and more flavorful it will become.
Step 7: Rinse and Dry
After the curing period, carefully unwrap the salmon and rinse off the cure mixture under cold water. Pat the salmon dry with paper towels.
Step 8: Slice and Serve
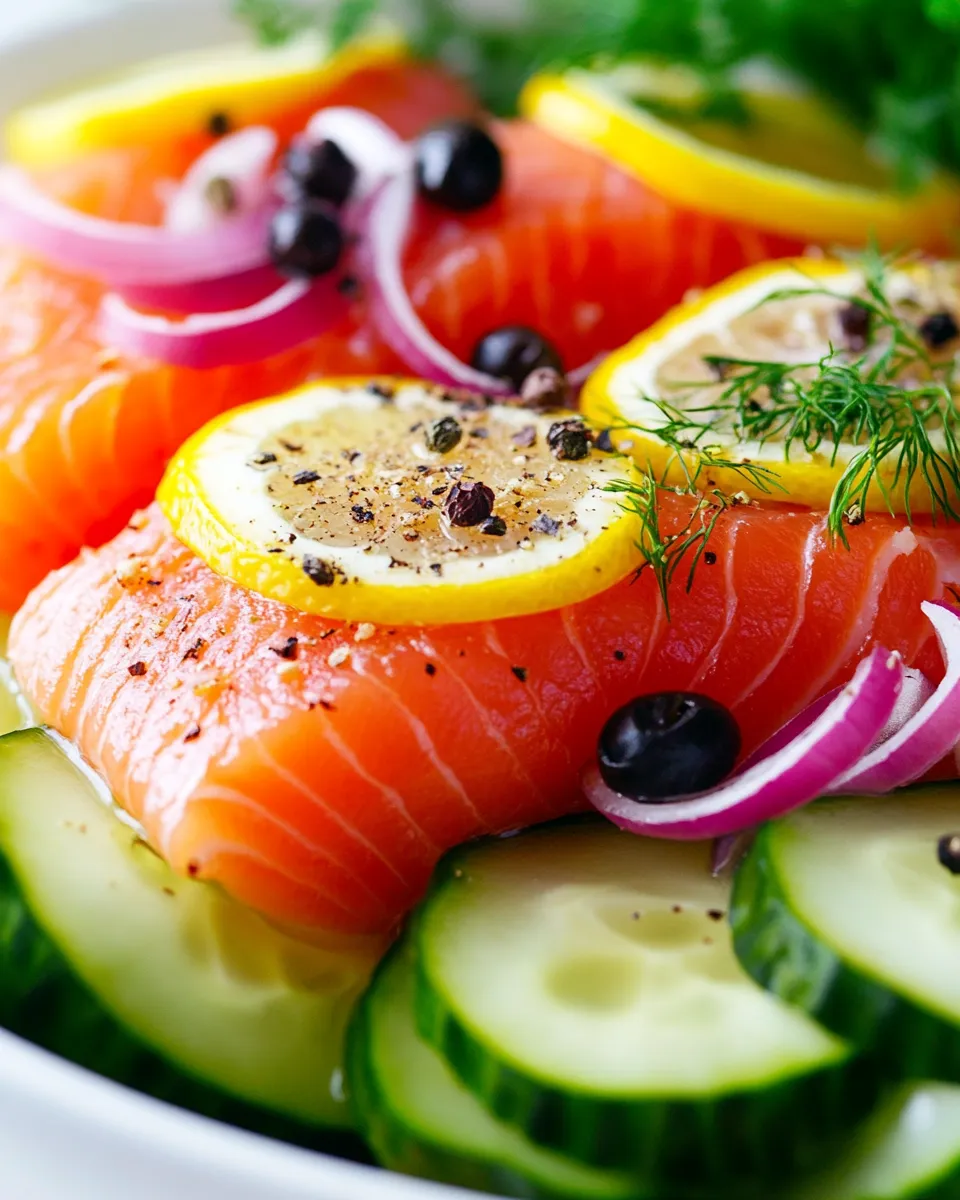
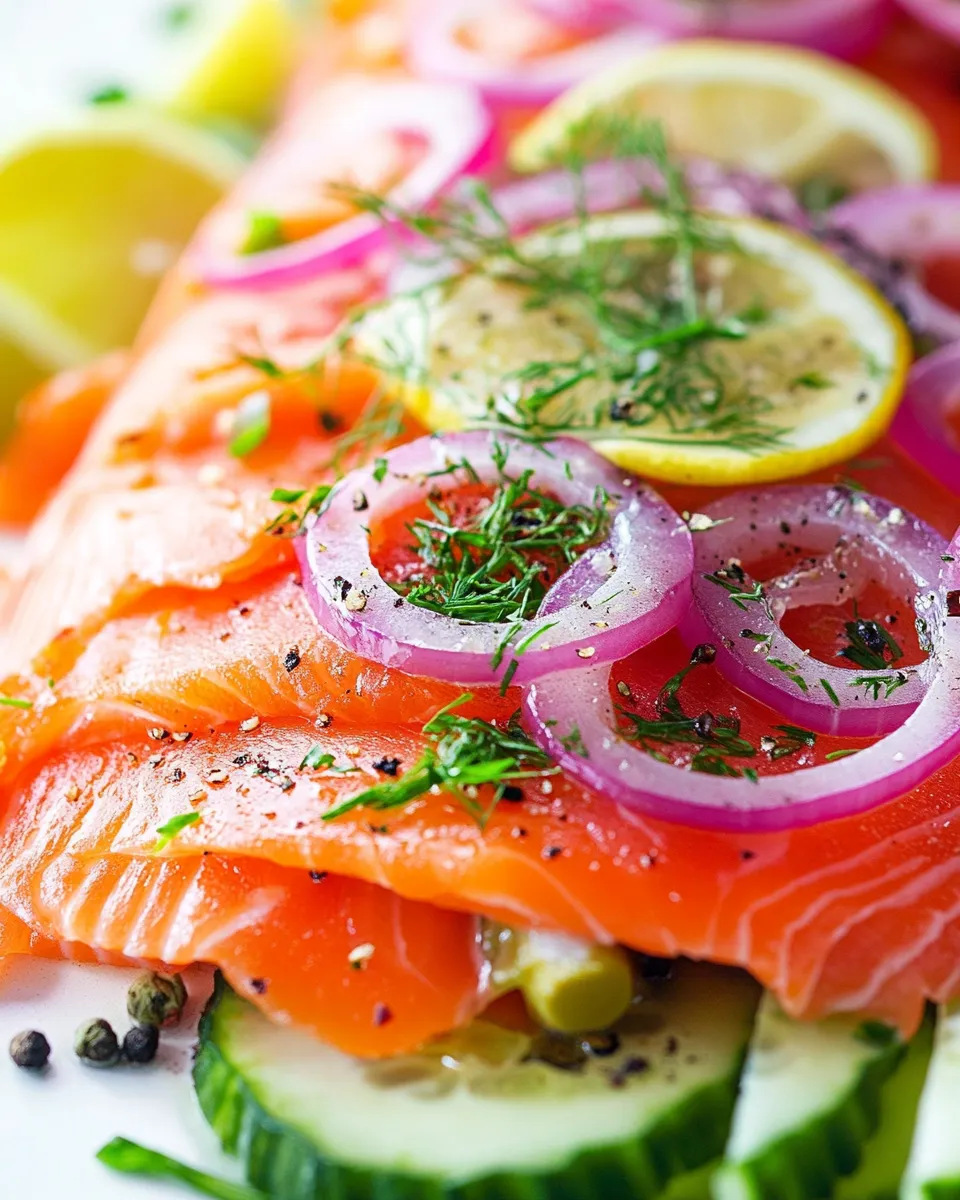
Using a sharp knife, slice the salmon thinly at a diagonal angle. Serve on a bagel with cream cheese, capers, and more fresh dill, or enjoy it on its own as a delectable snack.
Dairy-Free/Gluten-Free Swaps
If you’re looking for alternatives to fit specific dietary needs, consider the following:
- Dairy-free cream cheese: Use a plant-based cream cheese spread for your bagels.
- Gluten-free bagels: Opt for gluten-free bagels or serve on gluten-free crackers.
- Serve with avocado: Instead of cream cheese, avocado slices can add creaminess.
- Vegetables: Pair the lox with fresh veggies like cucumbers and tomatoes for a refreshing side.
Troubles You Can Avoid
To ensure your lox turns out perfectly, here are some potential issues to avoid:
- Using low-quality salmon: Always choose fresh, high-quality fish to avoid any off-flavors.
- Insufficient curing time: Don’t rush the process; allow enough time for the salmon to absorb the flavors.
- Not rinsing properly: Ensure you rinse off the cure thoroughly to avoid overly salty lox.
- Improper storage: Make sure to store your lox correctly to maintain freshness.
Save for Later: Storage Tips
To keep your homemade lox fresh and delicious, follow these storage tips:
- Refrigeration: Store your lox in an airtight container in the refrigerator. It’s best consumed within a week.
- Freezing: For longer storage, wrap slices in plastic wrap and place them in a freezer bag. Lox can be frozen for up to three months.
- Thawing: Thaw in the refrigerator overnight before consuming.
Common Questions
Can I use a different type of fish for this recipe?
While salmon is traditional for lox, you can experiment with other fatty fish like trout or mackerel, keeping in mind the flavor profile will change.
How do I know when the lox is done curing?
The lox will feel firmer to the touch and have a more concentrated flavor. If it’s too soft or mushy, it may need more time.
Can I adjust the spices in the curing mix?
Absolutely! Feel free to customize the spices to your liking. Just remember that the balance of salt and sugar is crucial for proper curing.
What should I serve with homemade lox?
Homemade lox is delicious with bagels, cream cheese, capers, onions, or even on a salad. Pair it with your favorite accompaniments!
Similar Recipes
If you love this Homemade Lox Recipe, you might also enjoy:
Let’s Eat
Now that you’re armed with the knowledge to create this delicious Homemade Lox Recipe, it’s time to roll up your sleeves and get started! The process may take a few days, but the anticipation and the incredible flavor of your homemade lox will be worth the wait. Whether you enjoy it on a bagel, in a salad, or simply on its own, your homemade lox is sure to impress. Happy curing!
Homemade Lox Recipe
Ingredients
Equipment
Method
- In a medium bowl, combine the granulated sugar, kosher salt, and coarsely ground multi-color peppercorns. Mix well until all ingredients are evenly distributed.
- Stir in the liquid smoke, finely chopped dill, and chili pepper flakes to the cure mixture.
- Place the salmon fillet skin-side down in a glass baking dish.
- Generously sprinkle the cure mixture evenly over the salmon, ensuring every inch is covered.
- Cover the salmon with parchment paper and then wrap it tightly with plastic wrap. Place a weight on top to help compress the salmon during curing.
- Refrigerate the salmon for 48 to 72 hours, checking daily.
- After the curing period, carefully unwrap the salmon and rinse off the cure mixture under cold water. Pat the salmon dry with paper towels.
- Using a sharp knife, slice the salmon thinly at a diagonal angle.
Notes
- Always choose fresh, high-quality salmon for best results.
- Allow enough curing time for maximum flavor.
- Rinse the salmon thoroughly to avoid overly salty lox.
- Store lox in an airtight container in the refrigerator.
- For long-term storage, wrap slices in plastic and freeze.