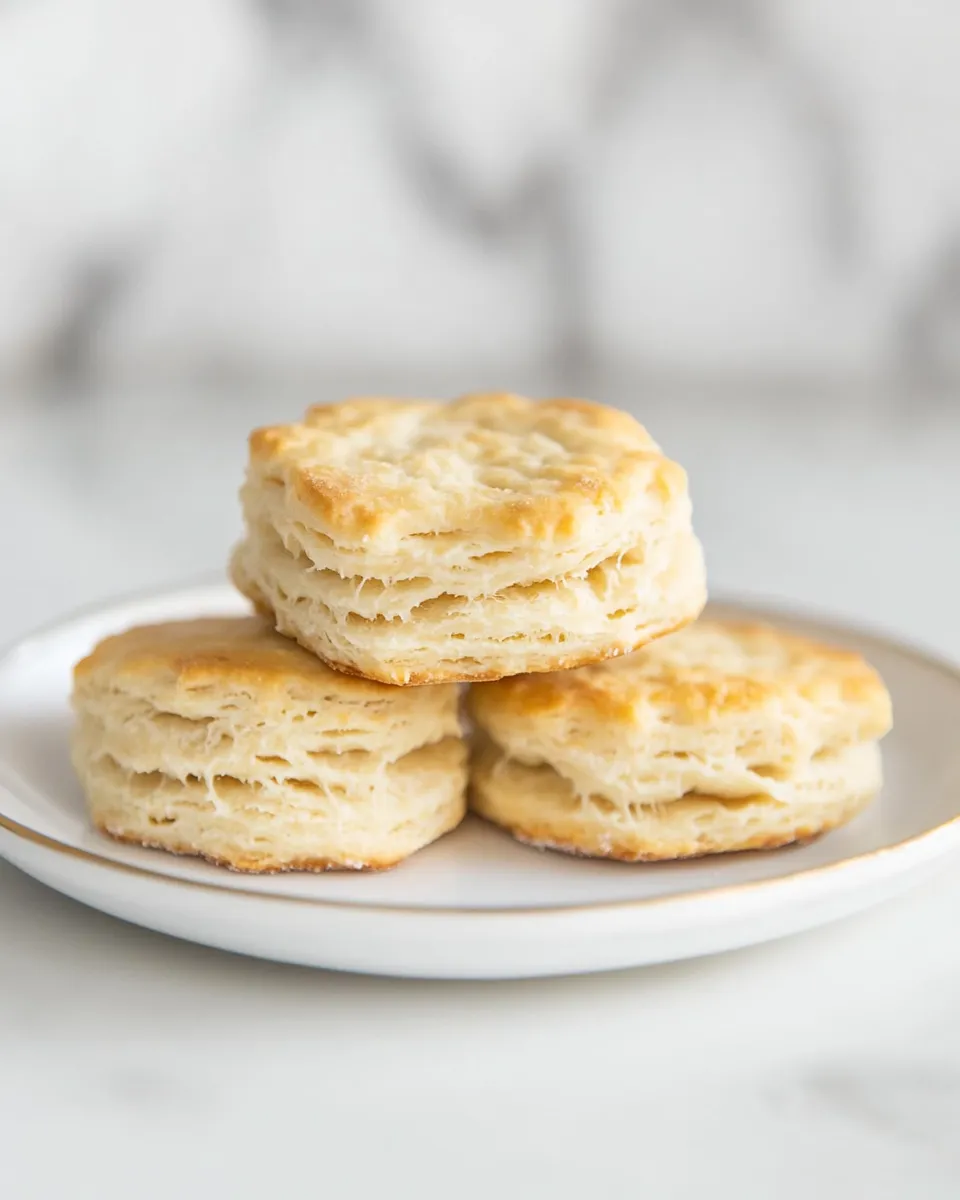
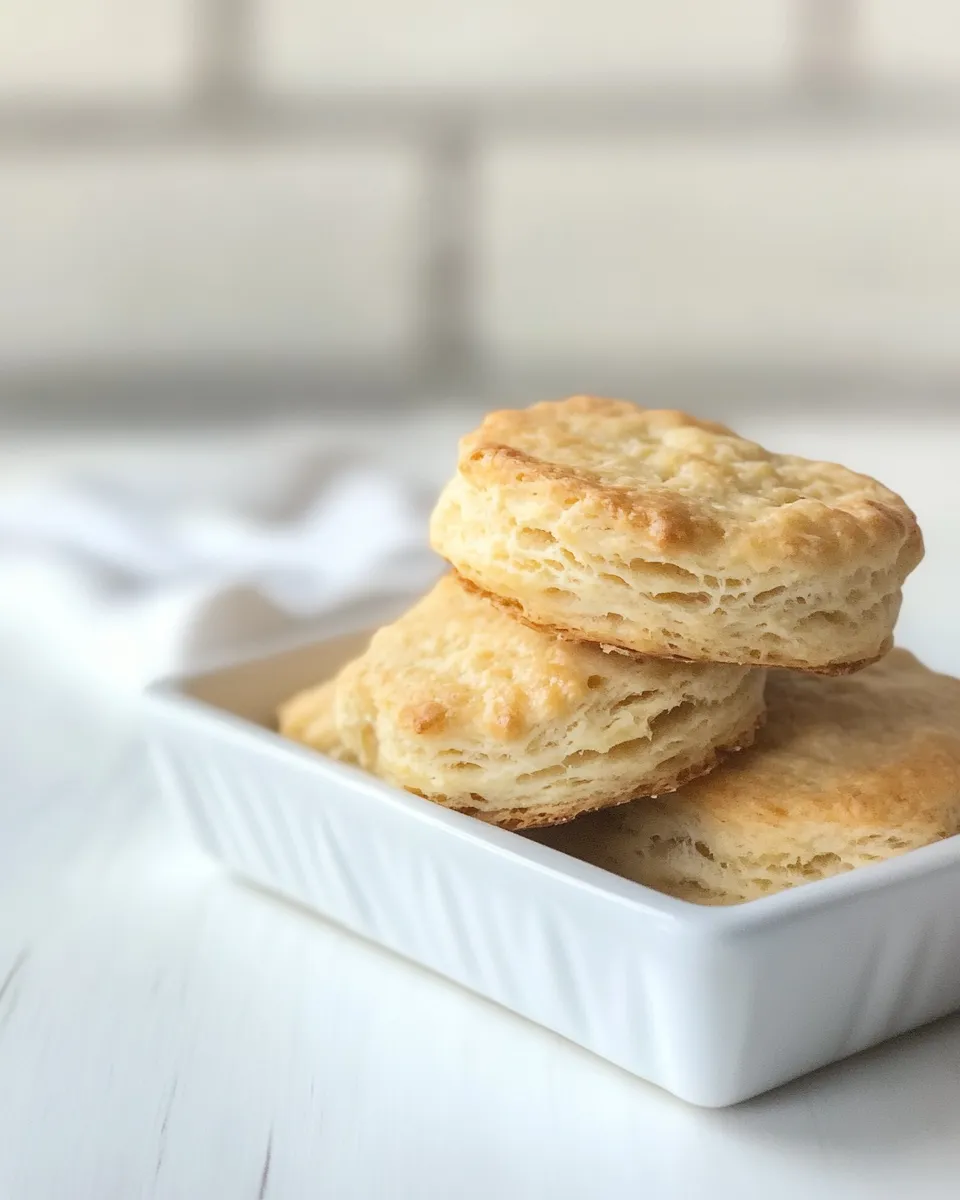
Homemade Biscuits
There’s something incredibly comforting about the smell of freshly baked biscuits wafting through your kitchen. Whether enjoyed with a dollop of jam, smothered in gravy, or simply slathered with butter, homemade biscuits have a way of making every meal feel special. They’re fluffy, buttery, and downright irresistible. Let’s dive into the world of biscuit-making, where the key to success lies in a few simple ingredients and techniques.
Why It’s My Go-To

Homemade biscuits are a staple in my kitchen for many reasons. First, they require minimal ingredients that you likely already have on hand. Second, they can be whipped up in less than 30 minutes, making them perfect for impromptu breakfasts or side dishes. Lastly, each bite is a delightful reminder of cozy family gatherings and Sunday brunches. This recipe is my go-to because it yields light, flaky biscuits that are simply unbeatable.
Ingredient Rundown
To create these delightful homemade biscuits, you’ll need the following ingredients:
- 2 cups all-purpose flour: The base of the biscuit, providing structure.
- 1 tablespoon baking powder: This helps the biscuits rise and become fluffy.
- 2 teaspoons granulated sugar: Adds a touch of sweetness to balance the flavors.
- 1 teaspoon salt: Enhances the overall flavor of the biscuits.
- 6 tablespoons butter: Very cold butter is essential for flaky layers. Freezing it for 10-20 minutes before using helps achieve this.
- ¾ cup buttermilk: Provides moisture and a slight tang. You can also use 2% or whole milk in a pinch.
- Salted butter (melted, optional): Drizzling this on top before serving adds an extra layer of richness.
Essential Tools for Success
Before you start mixing, make sure you have the following tools handy:
- Mixing bowl: For combining your dry and wet ingredients.
- Pastry cutter or fork: To cut the cold butter into the flour mixture.
- Baking sheet: For placing your biscuits while they bake.
- Parchment paper (optional): Keeps biscuits from sticking to the baking sheet.
- Rolling pin (optional): If you prefer rolling the dough rather than patting it out by hand.
- Cookie cutter or glass: For cutting out the biscuits.
Make Homemade Biscuits: A Simple Method

Making homemade biscuits is easier than you might think! Follow these simple steps:
Step 1: Preheat Your Oven
Preheat your oven to 450°F (232°C). This high temperature is key to achieving that perfect rise and golden-brown exterior.
Step 2: Combine Dry Ingredients
In a large mixing bowl, whisk together 2 cups of all-purpose flour, 1 tablespoon of baking powder, 2 teaspoons of granulated sugar, and 1 teaspoon of salt. Make sure there are no lumps and everything is well combined.
Step 3: Cut in the Butter
Take your very cold butter (that you’ve frozen for 10-20 minutes) and cut it into small cubes. Add the cubes to the flour mixture. Using a pastry cutter or a fork, cut the butter into the flour until the mixture resembles coarse crumbs. You want to see small chunks of butter throughout for flaky layers.
Step 4: Add the Buttermilk
Make a well in the center of the flour mixture and pour in ¾ cup of buttermilk. Gently stir until just combined. Be careful not to overmix; a few lumps are okay!
Step 5: Form the Dough
Turn the dough out onto a lightly floured surface. Gently knead it 2-3 times until it just comes together. Pat it into a rectangle about ¾ inch thick.
Step 6: Cut the Biscuits
Use a cookie cutter or a glass to cut out biscuits from the dough. Place them on a baking sheet lined with parchment paper, ensuring they are close together for soft sides. Gather any scraps and re-roll to cut more biscuits.
Step 7: Bake
Bake in the preheated oven for 12-15 minutes, or until the tops are golden brown. The smell will be heavenly!
Step 8: Optional Butter Drizzle
If you like, melt some salted butter and brush it over the hot biscuits as soon as they come out of the oven. This adds a touch of indulgence that’s hard to resist.
If You’re Out Of…
If you find yourself missing an ingredient, don’t fret! Here are some alternatives:
- Buttermilk: You can substitute it with a mixture of ¾ cup milk and 1 tablespoon of vinegar or lemon juice. Let it sit for about 5 minutes to curdle.
- All-purpose flour: You can use whole wheat flour, but the biscuits may be denser.
- Butter: Coconut oil or vegetable shortening can replace butter, but the flavor will differ slightly.
- Baking powder: If you’re out, you can substitute with ¼ teaspoon baking soda and ½ teaspoon cream of tartar.
Things That Go Wrong
Even the best bakers can encounter issues. Here’s what to watch out for:
- Dense biscuits: This usually happens from overmixing the dough or using too much flour. Be gentle!
- Flat biscuits: Ensure your baking powder is fresh and your oven is preheated properly.
- Burnt bottoms: This can occur if biscuits are placed too close to the bottom element of the oven. Consider using a middle rack for even baking.
- Too crumbly: If the biscuits fall apart, it may be due to too much flour or not enough liquid. Adjust accordingly next time.
Meal Prep & Storage Notes
To enjoy homemade biscuits anytime, here are some meal prep and storage tips:
You can make the dough ahead of time and refrigerate it for up to 2 days. Just wrap it tightly in plastic wrap. When you’re ready to bake, roll it out, cut the biscuits, and bake as directed. Alternatively, you can freeze the unbaked biscuits on a baking sheet until solid, then transfer them to a freezer bag. They can be baked straight from the freezer, adding a few minutes to the baking time.
- Storage: Baked biscuits can be stored in an airtight container at room temperature for up to 3 days.
- Reheating: To reheat, place biscuits in a preheated oven at 350°F (175°C) for about 5-10 minutes or until warmed through.
Troubleshooting Q&A
Why are my biscuits tough?
Tough biscuits often result from overworking the dough. Remember, the less you handle the dough, the more tender your biscuits will be.
What can I do if my biscuits are too salty?
If your biscuits turn out too salty, you could try balancing them with a sweet topping like honey or jam, or serve them with a less salty dish to balance the flavors.
How do I know when my biscuits are done?
Your biscuits are done when they have risen and are golden brown on top. A toothpick inserted in the center should come out clean.
Can I make flavored biscuits?
Absolutely! Consider adding ingredients like shredded cheese, chopped herbs, or spices to customize your biscuits to your liking.
Don’t Miss These
- Sally’s Baking Addiction – For more delightful baking recipes.
- Pinch of Yum – A treasure trove of delicious recipes.
- Minimalist Baker – Simple recipes that are easy to follow.
Wrap-Up
Homemade biscuits are not just a recipe; they are a labor of love that brings joy to any meal. With just a handful of ingredients and a little time, you can create warm, flaky biscuits that will have everyone coming back for seconds. Whether slathered with butter, served with gravy, or enjoyed plain, these biscuits will undoubtedly become a favorite in your home. So gather your ingredients, preheat your oven, and let the delightful baking begin! There’s nothing quite like the satisfaction of pulling a tray of freshly baked homemade biscuits from the oven. Enjoy every delicious bite!
Homemade Biscuits
Ingredients
Equipment
Method
- Step 1: Preheat your oven to 450°F (232°C).
- Step 2: In a large mixing bowl, whisk together the flour, baking powder, sugar, and salt.
- Step 3: Cut the cold butter into small cubes and mix into the flour until it resembles coarse crumbs.
- Step 4: Create a well in the mixture and add the buttermilk, stirring gently until just combined.
- Step 5: Turn the dough onto a floured surface, knead gently, and pat it into a rectangle about ¾ inch thick.
- Step 6: Cut out the biscuits using a cookie cutter or glass and place them on a baking sheet.
- Step 7: Bake for 12-15 minutes until golden brown.
- Step 8: Optionally, brush melted salted butter over the biscuits after baking.
Notes
- For fluffier biscuits, ensure the butter is very cold.
- Freeze unbaked biscuits for later baking.
- Store baked biscuits in an airtight container for up to 3 days.