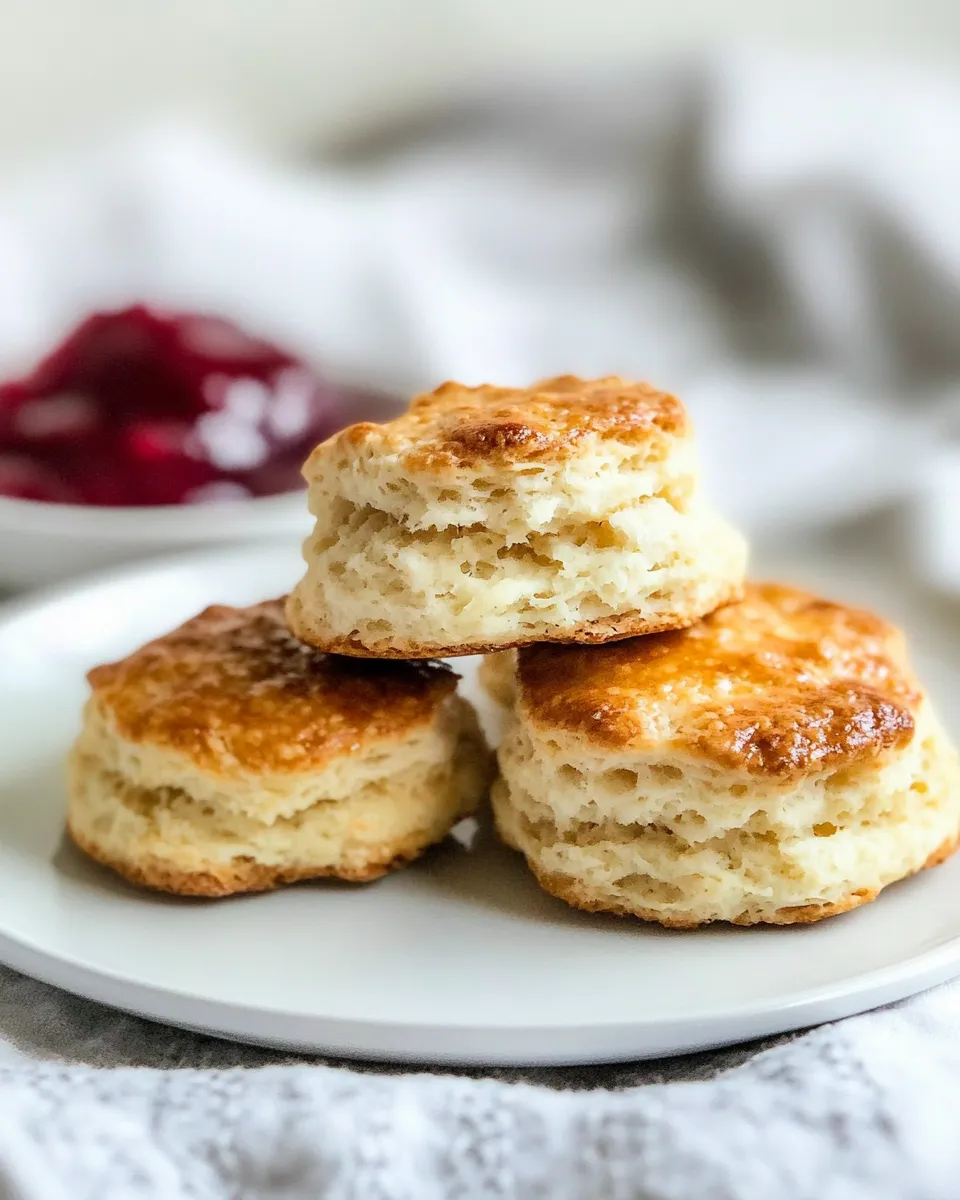
Classic English Scones
There’s something undeniably charming about a warm scone, especially when it’s fresh out of the oven, golden brown, and just waiting to be slathered with clotted cream and jam. Whether enjoyed with a cup of tea or as a delightful breakfast treat, Classic English Scones have a special place in the hearts of many. They are versatile, easy to make, and the perfect canvas for creativity. Let’s dive into the world of scones and make your kitchen the ultimate bakery!
Why It’s My Go-To

Classic English Scones are my go-to recipe because they bring comfort and joy with each bite. The crumb is tender yet flaky, and they have just the right amount of sweetness. These scones are incredibly adaptable, allowing you to add your favorite flavors or mix-ins, making them suitable for any occasion. Plus, they come together quickly, making them perfect for those busy mornings or spontaneous tea parties.
What’s in the Bowl
To whip up a batch of Classic English Scones, you’ll need a handful of simple ingredients that you probably already have in your pantry. Here’s what you’ll need:
- 2 3/4 cups all-purpose flour – This is the base of your scones, providing structure and a soft crumb.
- 1/4 cup granulated sugar – For a touch of sweetness that complements the buttery flavor.
- 1 teaspoon baking powder – This helps the scones rise and become fluffy.
- 1/2 teaspoon salt – Enhances the flavors and balances the sweetness.
- 6 tablespoons unsalted butter – Cold and cubed, it creates flakiness in the dough.
- 3/4 cup buttermilk – Adds moisture and tenderness, while also contributing a subtle tang.
- 1 teaspoon vanilla extract – A hint of vanilla adds depth to the flavor profile.
Equipment at a Glance
Before we start baking, let’s gather our tools. Having the right equipment will make the process smoother:
- Mixing bowl – For combining dry ingredients and mixing the dough.
- Pastry cutter or fork – To cut the butter into the flour, creating a crumbly texture.
- Baking sheet – A sturdy surface for placing your scones in the oven.
- Parchment paper – Optional, but it helps prevent sticking and makes cleanup easier.
- Oven mitts – Safety first when handling hot trays!
- Cookie cutter or glass – For cutting out the scones into the perfect shape.
Build Classic English Scones Step by Step

Now that we have everything ready, let’s get down to the nitty-gritty of making Classic English Scones. Follow these steps for scones that will impress your family and friends.
Step 1: Preheat the Oven
Preheat your oven to 400°F (200°C). This ensures that your scones bake evenly and develop a lovely golden color.
Step 2: Combine Dry Ingredients
In a large mixing bowl, whisk together the all-purpose flour, granulated sugar, baking powder, and salt. Make sure these dry ingredients are well combined to ensure even leavening.
Step 3: Cut in the Butter
Add the cold, cubed unsalted butter to the dry mixture. Using a pastry cutter or fork, cut the butter into the flour until the mixture resembles coarse crumbs. Be careful not to overwork the dough; you want to see small pieces of butter throughout.
Step 4: Mix in Wet Ingredients
In a separate bowl, combine the buttermilk and vanilla extract. Pour this mixture into the flour and butter mixture. Stir gently until just combined. The dough should be slightly sticky but not overly wet.
Step 5: Shape the Dough
Turn the dough out onto a floured surface. Gently knead it a few times until it comes together. Pat the dough into a circle about 1 inch thick. Remember, the less you handle the dough, the lighter your scones will be!
Step 6: Cut the Scones
Using a floured cookie cutter or glass, cut out rounds from the dough. Place them on a baking sheet lined with parchment paper, spacing them about 1 inch apart. Gather any scraps, re-knead gently, and cut out additional scones.
Step 7: Bake
Bake the scones in the preheated oven for 15-20 minutes or until they are golden brown on top. You’ll know they’re ready when they smell incredible and a toothpick inserted into the center comes out clean.
Step 8: Cool and Serve
Remove the scones from the oven and let them cool on a wire rack for a few minutes. Serve warm with clotted cream and your favorite jam for the ultimate treat!
Spring–Summer–Fall–Winter Ideas
These Classic English Scones can be enjoyed year-round, and you can easily switch up the flavors to match the seasons. Here are some ideas to inspire you:
- Spring: Add fresh strawberries or lemon zest for a bright, fruity flavor.
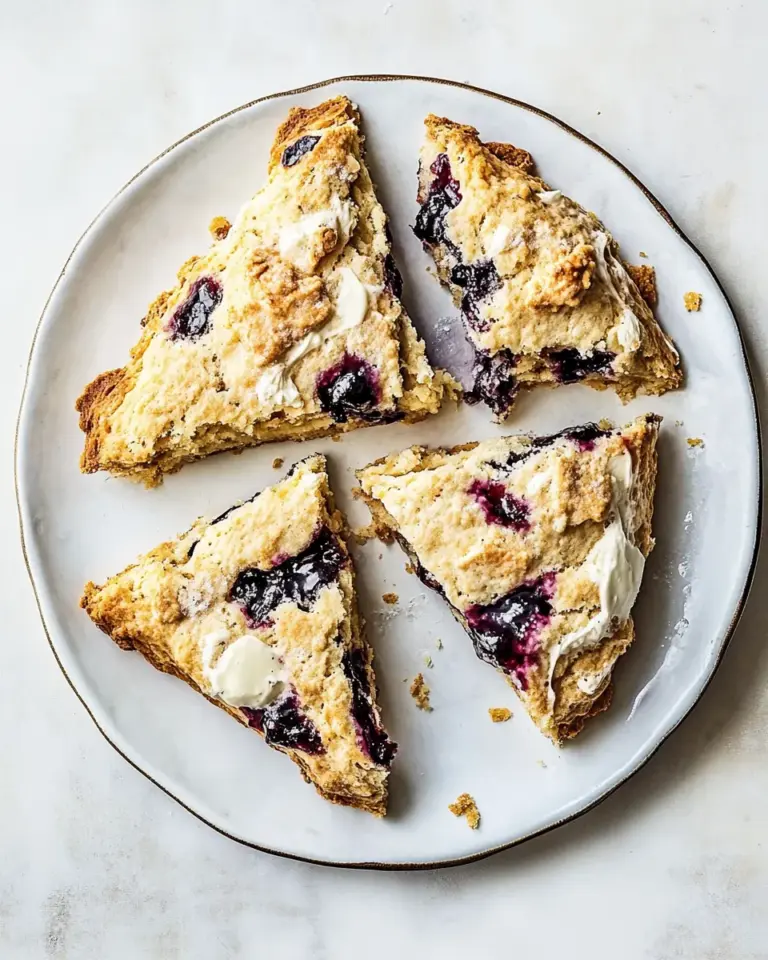
- Summer: Incorporate blueberries or raspberries for a burst of sweetness.
- Fall: Mix in chopped apples and a sprinkle of cinnamon for a cozy vibe.
- Winter: Add dried cranberries or orange zest for a festive touch.
Missteps & Fixes
Even the best bakers can encounter a few hiccups along the way. Here are some common missteps and how to fix them:
- Dense Scones: This can happen if the dough is overworked. Mix just until combined and avoid excessive kneading.
- Flat Scones: Make sure your baking powder is fresh and your oven is properly preheated.
- Dry Scones: This may be due to too much flour. Measure accurately and avoid packing the flour into the cup.
- Burnt Bottoms: If using a dark baking sheet, reduce the baking time slightly to prevent over-browning.
Save for Later: Storage Tips
To enjoy your scones at their best, follow these storage tips:
- Room Temperature: Store in an airtight container for up to 2 days.
- Refrigerate: If you need to keep them longer, refrigerate for up to a week.
- Freeze: For longer storage, freeze the unbaked scones on a baking sheet, then transfer to a zip-top bag. Bake from frozen, adding a few extra minutes to the baking time.
Common Questions
Can I use whole wheat flour instead of all-purpose flour?
Yes, you can substitute half of the all-purpose flour with whole wheat flour for a nuttier flavor and added nutrition. However, this may alter the texture slightly.
What can I use instead of buttermilk?
If you don’t have buttermilk on hand, you can make a substitute by mixing 3/4 cup of milk with 1 tablespoon of vinegar or lemon juice. Let it sit for about 5 minutes before using.
Can I add mix-ins to my scones?
Absolutely! Feel free to add chocolate chips, nuts, or dried fruits to the dough. Just be mindful of the quantity, as too many add-ins can affect the texture.
How do I know when my scones are done baking?
Your scones are ready when they are golden brown on top and a toothpick inserted in the center comes out clean. They should also feel firm to the touch.
Quick Weeknight Wins
If you’re looking for quick meals that pair perfectly with your Classic English Scones, check out these links:
- Quick Chili Recipe – A hearty dish to enjoy with scones.
- Easy Vegan Soup – Warm and comforting, perfect for dipping.
- 30-Minute Skillet Dinner – A speedy meal to complement your scones.
Before You Go
Classic English Scones are a delightful treat that can easily become a staple in your baking repertoire. With just a few simple ingredients and a little bit of time, you can enjoy the warm, tender goodness straight from your oven. Whether you opt for the classic version or experiment with seasonal flavors, these scones will surely impress. So put on your apron, gather your ingredients, and let’s get baking!

Classic English Scones
Ingredients
Equipment
Method
- Preheat your oven to 400°F (200°C).
- In a large mixing bowl, whisk together the all-purpose flour, granulated sugar, baking powder, and salt.
- Add the cold, cubed unsalted butter to the dry mixture and cut it in until it resembles coarse crumbs.
- In a separate bowl, mix the buttermilk and vanilla extract, then pour into the flour mixture and stir gently until combined.
- Turn the dough onto a floured surface, knead gently, and pat into a circle about 1 inch thick.
- Cut out rounds using a floured cookie cutter and place them on a baking sheet lined with parchment paper.
- Bake for 15-20 minutes or until golden brown on top.
- Let cool on a wire rack for a few minutes before serving warm with clotted cream and jam.
Notes
- Store scones in an airtight container for up to 2 days at room temperature.
- Refrigerate for up to a week for longer freshness.
- Freeze unbaked scones to enjoy later; bake from frozen.