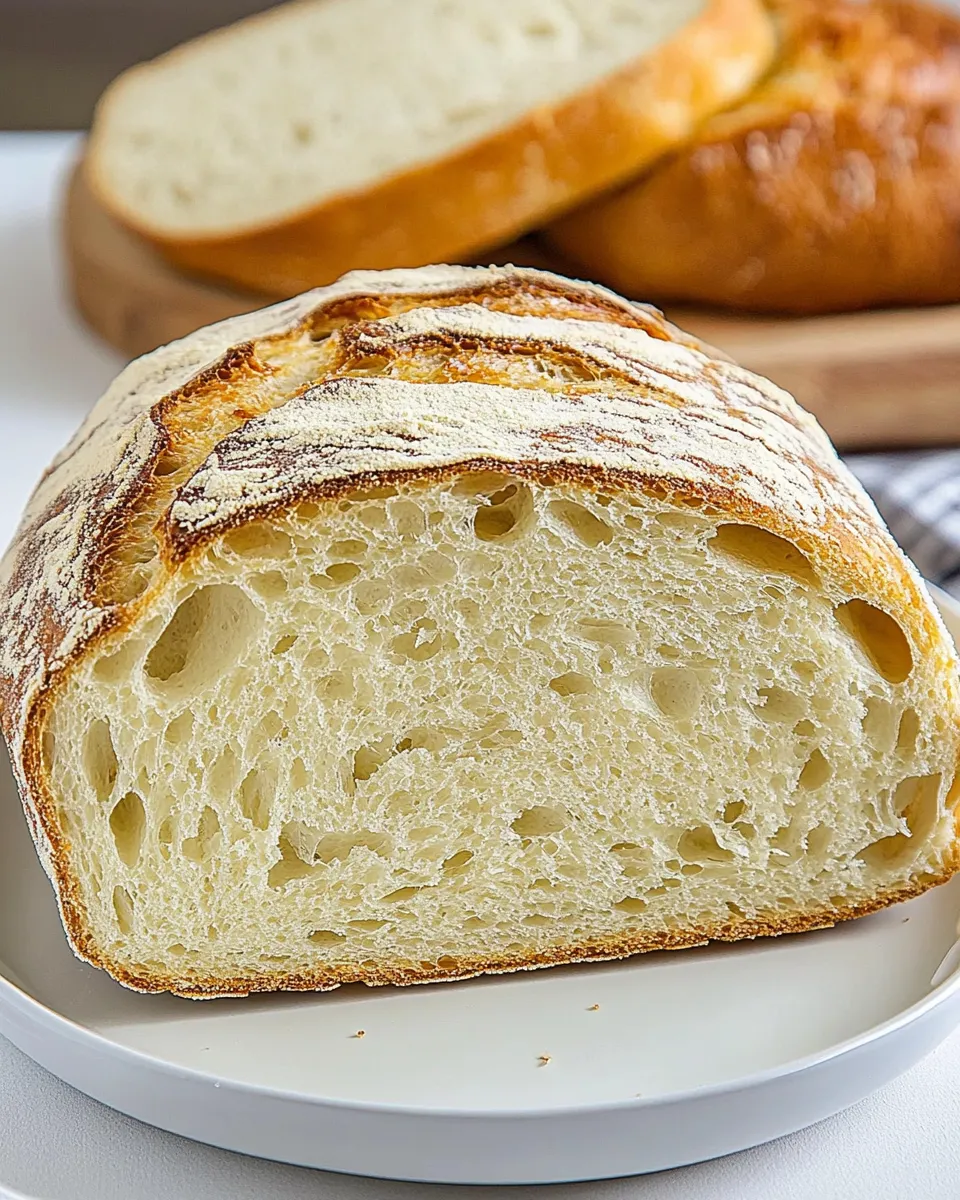
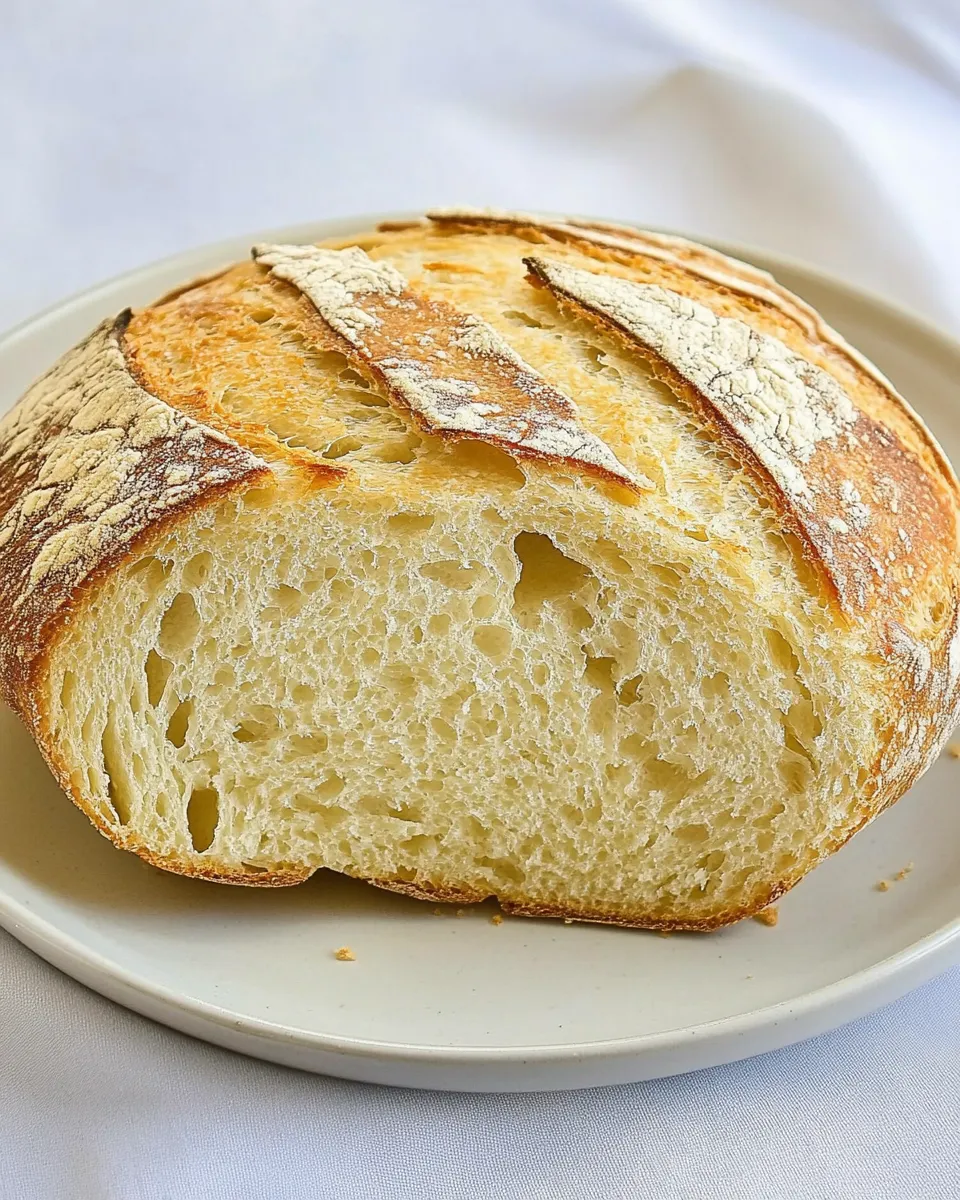
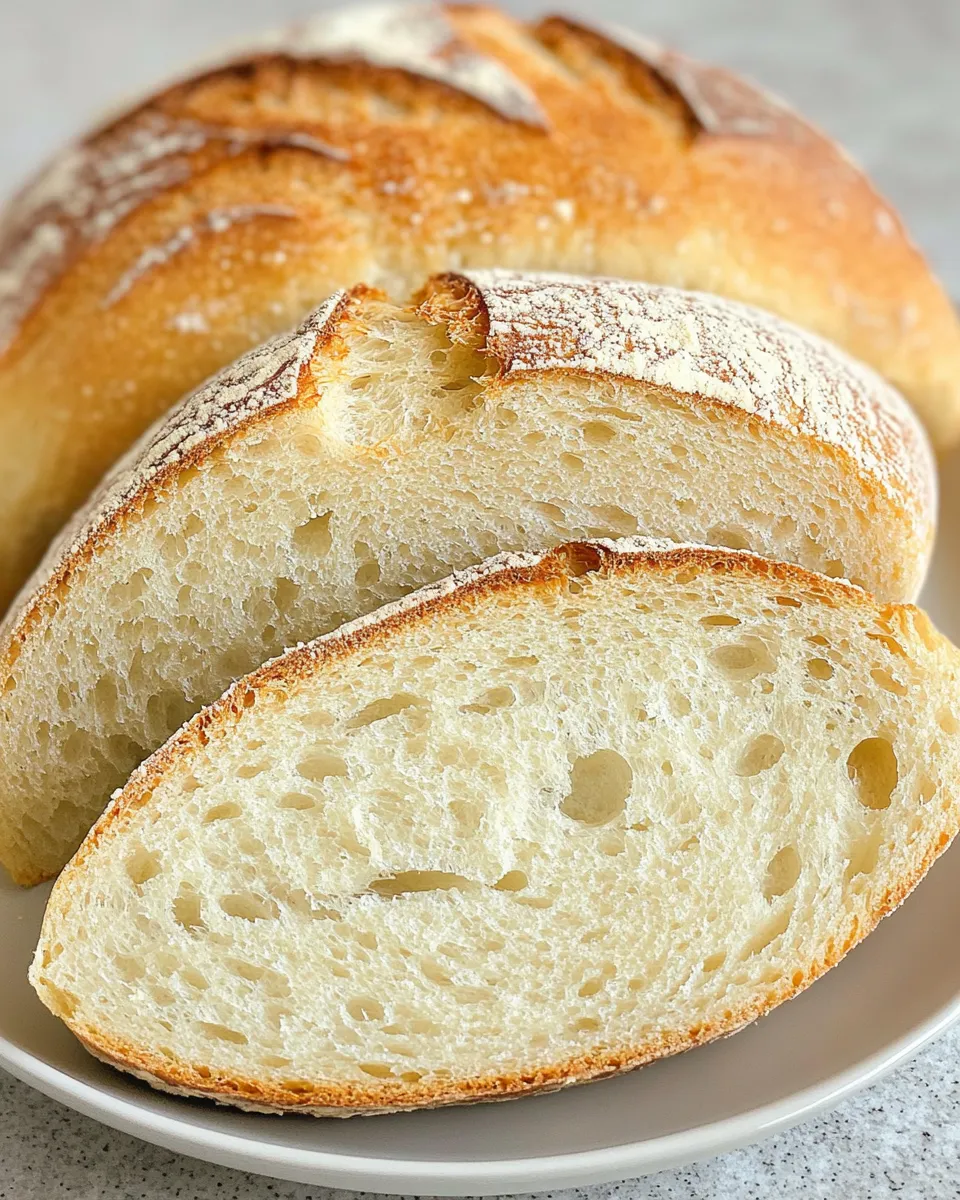
Artisan Bread
Artisan bread is a celebration of simplicity and craftsmanship, offering an experience that goes beyond mere sustenance. The process of baking artisan bread is as rewarding as the final product itself, filling your kitchen with warmth and the irresistible aroma of freshly baked goods. With just a handful of ingredients, you can create a crusty loaf with a soft, chewy interior that is perfect for any occasion. Whether you’re slathering it with butter, making a sandwich, or enjoying it alongside a bowl of soup, artisan bread is a must-have in your baking repertoire.
Reasons to Love Artisan Bread
Artisan bread is not just about taste; it’s a connection to tradition and the art of baking. Here are a few reasons why you’ll fall in love with this bread:
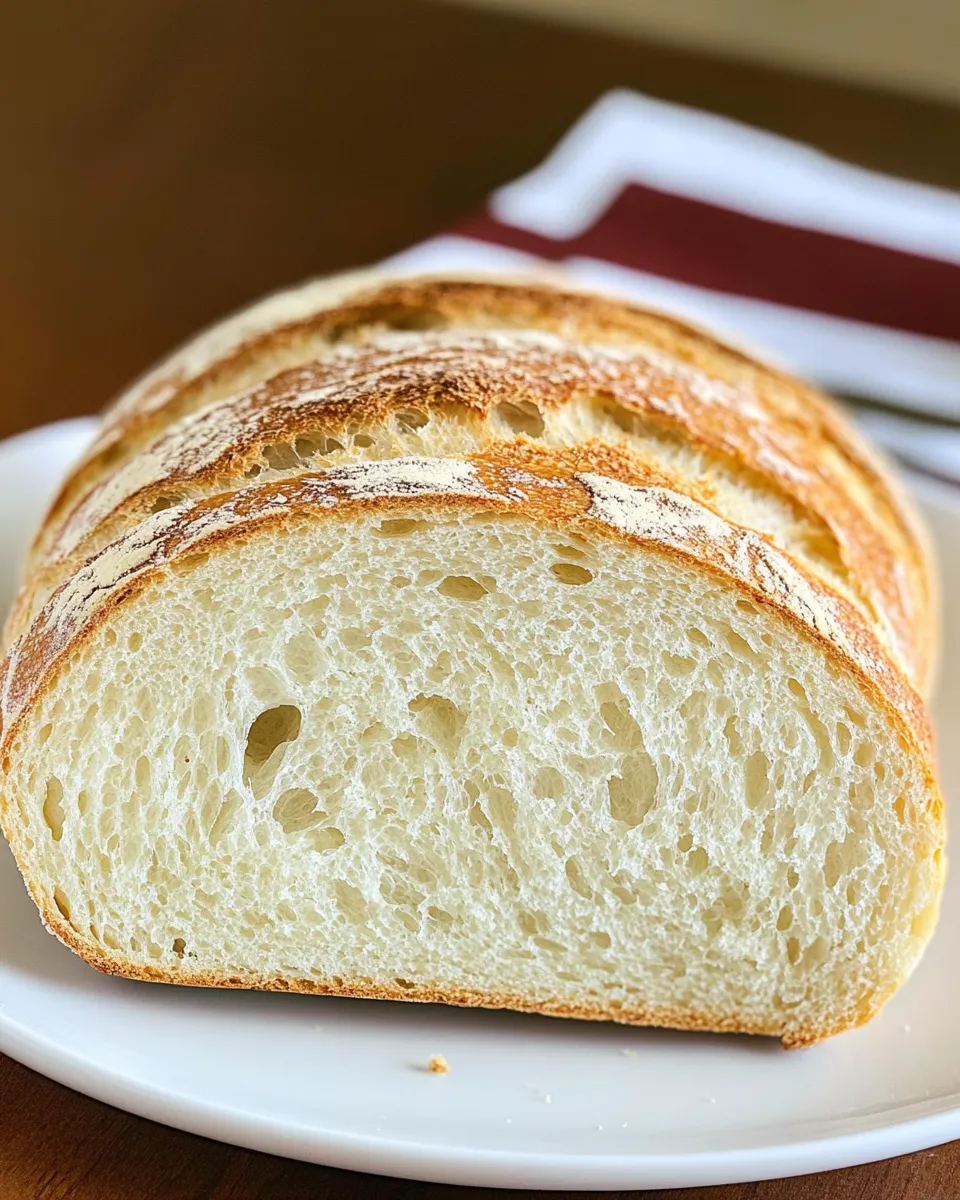
- Flavorful Crust: The crust is deeply caramelized, providing a delightful contrast to the tender crumb inside.
- Customizable: You can easily tweak the recipe with various add-ins to suit your taste preferences.
- Healthier Option: Using minimal ingredients means you can avoid preservatives and artificial additives.
- Therapeutic Process: Kneading and shaping the dough can be a stress-relieving activity.
- Impressive Presentation: A beautifully baked loaf is sure to impress friends and family.
The Ingredient Lineup
Creating artisan bread requires just a few simple ingredients that you likely already have in your pantry. Here’s what you’ll need:
- 3 cups lukewarm water: This helps activate the yeast for optimal rising.
- 1 tablespoon active dry yeast: The star of the show that gives the bread its rise and texture.
- 1 tablespoon salt: Essential for flavor and helps strengthen the dough.
- 6 cups all-purpose flour: The foundation of the bread, providing structure and chewiness.
Essential Tools for Success
Before diving into the baking process, gather these essential tools to ensure your success:
- Large mixing bowl: For combining and kneading your ingredients.
- Wooden spoon or dough whisk: Ideal for mixing the dough without overworking it.
- Kitchen scale: For precise measurements (optional, but helpful).
- Dutch oven or baking stone: To create a steamy environment that promotes a crispy crust.
- Kitchen towel: For covering the dough while it rises.
- Cooling rack: To allow the bread to cool evenly after baking.
Artisan Bread Cooking Guide
Now that you have your ingredients and tools ready, let’s get started on baking your artisan bread with this easy step-by-step guide.
Step 1: Activate the Yeast
In a large mixing bowl, combine the lukewarm water and active dry yeast. Stir gently and let it sit for about 5-10 minutes until it becomes frothy. This indicates that the yeast is alive and ready to work its magic.
Step 2: Mix the Dough
Add the salt and flour to the yeast mixture, one cup at a time, mixing with a wooden spoon or dough whisk until a shaggy dough forms. You may not need all the flour, so keep an eye on the dough’s consistency.
Step 3: Knead the Dough
Turn the dough out onto a lightly floured surface and knead for about 8-10 minutes until it becomes smooth and elastic. If the dough is too sticky, sprinkle a little more flour as needed.
Step 4: First Rise
Place the kneaded dough back into the mixing bowl and cover it with a kitchen towel. Let it rise in a warm, draft-free area for 1-2 hours or until it has doubled in size.
Step 5: Shape the Loaf
Once the dough has risen, punch it down to release the air. Turn it out onto a floured surface and shape it into a round or oval loaf, depending on your preference.
Step 6: Second Rise
Place the shaped loaf onto a piece of parchment paper and cover it with the kitchen towel again. Allow it to rise for another 30-60 minutes until it puffs up.
Step 7: Preheat the Oven
While the dough is rising for the second time, preheat your oven to 450°F (230°C). If you’re using a Dutch oven, place it in the oven to heat up as well.
Step 8: Bake the Bread
Once preheated, carefully remove the hot Dutch oven. Using the parchment paper, lift the dough and place it into the Dutch oven. Cover with the lid and bake for 30 minutes. After that, remove the lid and bake for an additional 15-20 minutes until the crust is golden brown.
Step 9: Cool
Once baked, remove the bread from the oven and transfer it to a cooling rack. Allow it to cool completely before slicing to ensure the best texture.
Ingredient Flex Options
Artisan bread is highly versatile, allowing you to experiment with different ingredients. Here are a few options to consider:
- Whole Wheat Flour: Substitute part or all of the all-purpose flour for whole wheat flour for a nuttier flavor and added nutrition.
- Herbs and Spices: Add dried herbs like rosemary or thyme to the dough for an aromatic twist.
- Seeds: Incorporate seeds like sesame or poppy for added crunch and flavor.
- Cheese: Fold in shredded cheese for a savory addition.
- Olives or Nuts: Chopped olives or nuts can add a delightful texture and unique flavor.
Method to the Madness
Baking artisan bread is as much about the method as it is about the ingredients. The process involves patience, but the rewards are well worth it.
Start by ensuring your yeast is active; this is crucial for a good rise. Kneading the dough helps develop gluten, which gives the bread structure. Don’t rush the rising times; they are essential for flavor development and texture. The high baking temperature creates steam, leading to a crispy crust while locking in moisture. Always allow your bread to cool completely before slicing, as this helps set the crumb and enhances the overall texture.
Keep It Fresh: Storage Guide
To ensure your artisan bread remains fresh, follow these storage tips:
- Room Temperature: Store the bread in a paper bag at room temperature for up to 3 days.
- Freezing: For longer storage, wrap the bread tightly in plastic wrap and then in aluminum foil before freezing. It can last up to 3 months.
- Reheating: To refresh stale bread, sprinkle it with a little water and warm it in a preheated oven for 5-10 minutes.
Common Qs About Artisan Bread
Can I use instant yeast instead of active dry yeast?
Yes, you can substitute instant yeast for active dry yeast. You may need to adjust the liquid slightly, as instant yeast absorbs less moisture.
What makes artisan bread different from regular bread?
Artisan bread is typically made using traditional methods with minimal ingredients, resulting in a crusty exterior and a chewy interior. It often involves longer fermentation times, which enhances the flavor.
Why is my bread dense?
A dense loaf can occur if the dough was not kneaded enough, the yeast was inactive, or it did not rise properly. Ensure you follow the steps carefully for the best results.
How do I achieve a crispy crust?
To achieve a crispy crust, bake your bread in a hot oven and consider adding steam during the first few minutes of baking. This can be done by placing a pan of water in the oven or using a Dutch oven.
Our Most-Loved Recipes
If you’re looking to expand your artisan bread collection, check out these favorites:
That’s a Wrap
Artisan bread is more than just a loaf; it represents a journey filled with flavor, creativity, and craftsmanship. With the right ingredients, a bit of patience, and practice, you can bake bread that rivals any bakery. The joy of pulling a perfectly baked loaf from the oven is unmatched.
So, roll up your sleeves, gather your ingredients, and enjoy the process of making artisan bread at home. Your taste buds will thank you, and your kitchen will be filled with the comforting aroma of freshly baked bread. Embrace the art of baking, and let your creativity flow with each loaf you create. Happy baking!
Artisan Bread
Ingredients
Equipment
Method
- In a large mixing bowl, combine the lukewarm water and active dry yeast. Stir gently and let it sit for about 5-10 minutes until it becomes frothy.
- Add the salt and flour to the yeast mixture, one cup at a time, mixing with a wooden spoon or dough whisk until a shaggy dough forms.
- Turn the dough out onto a lightly floured surface and knead for about 8-10 minutes until it becomes smooth and elastic.
- Place the kneaded dough back into the mixing bowl and cover it with a kitchen towel. Let it rise in a warm, draft-free area for 1-2 hours or until it has doubled in size.
- Once the dough has risen, punch it down to release the air. Turn it out onto a floured surface and shape it into a round or oval loaf.
- Place the shaped loaf onto a piece of parchment paper and cover it with the kitchen towel again. Allow it to rise for another 30-60 minutes until it puffs up.
- While the dough is rising for the second time, preheat your oven to 450°F (230°C). If using a Dutch oven, place it in the oven to heat up.
- Once preheated, carefully remove the hot Dutch oven. Using the parchment paper, lift the dough and place it into the Dutch oven. Cover with the lid and bake for 30 minutes.
- After that, remove the lid and bake for an additional 15-20 minutes until the crust is golden brown.
- Once baked, remove the bread from the oven and transfer it to a cooling rack. Allow it to cool completely before slicing.
Notes
- Use whole wheat flour for a nuttier flavor.
- Add herbs like rosemary for extra aroma.
- Store in a paper bag at room temperature for up to 3 days.