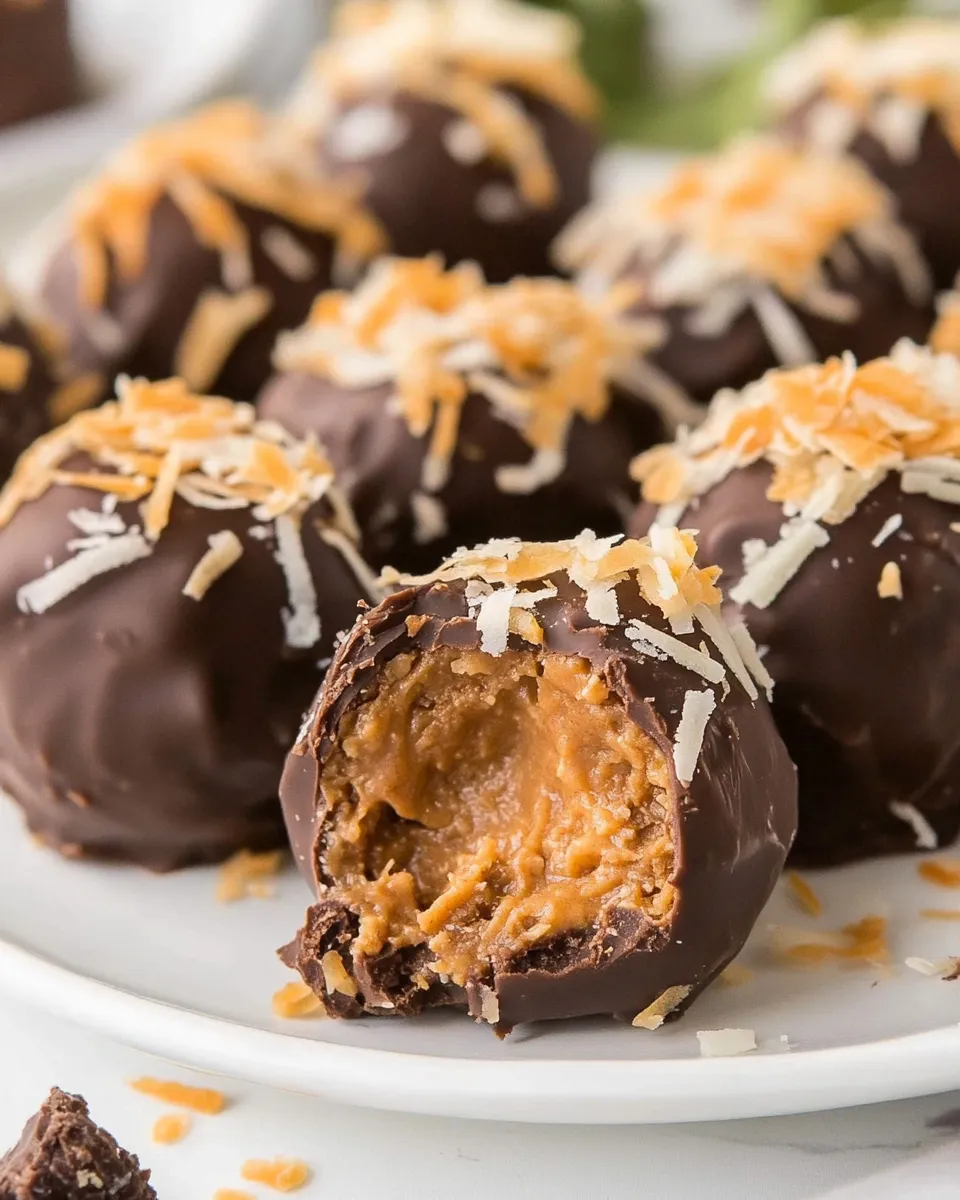
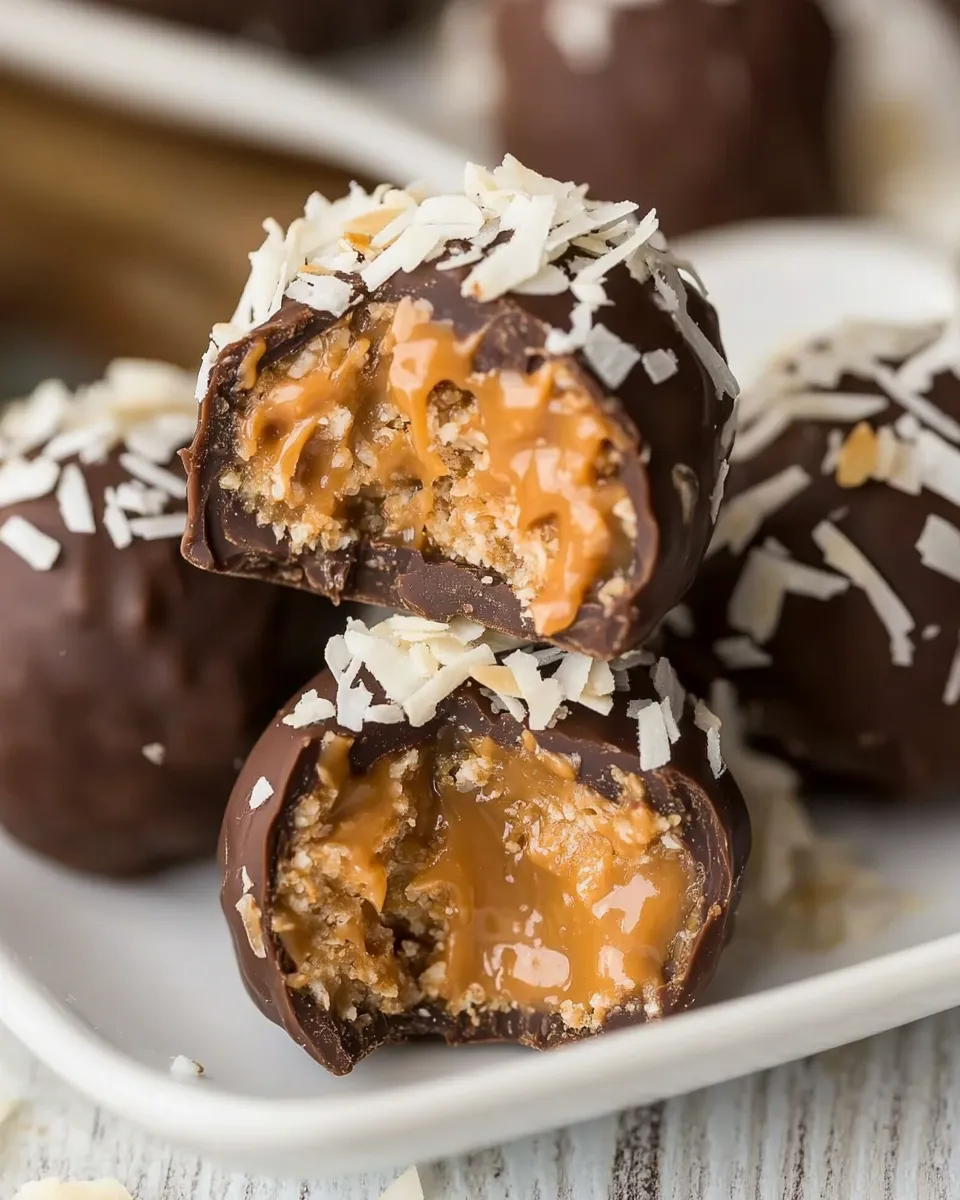
Samoa Truffles
Indulging in the world of desserts often leads us to discover delightful combinations that tantalize our taste buds. One such treat that stands out is the delectable Samoa Truffles. Inspired by the beloved Girl Scout cookie, these truffles encapsulate the essence of coconut, caramel, and chocolate in every bite. They are not only easy to make but also perfect for sharing or enjoying on your own. Let’s dive into this sweet adventure and explore how you can create these mouth-watering treats in your kitchen.
Why This Samoa Truffles Stands Out
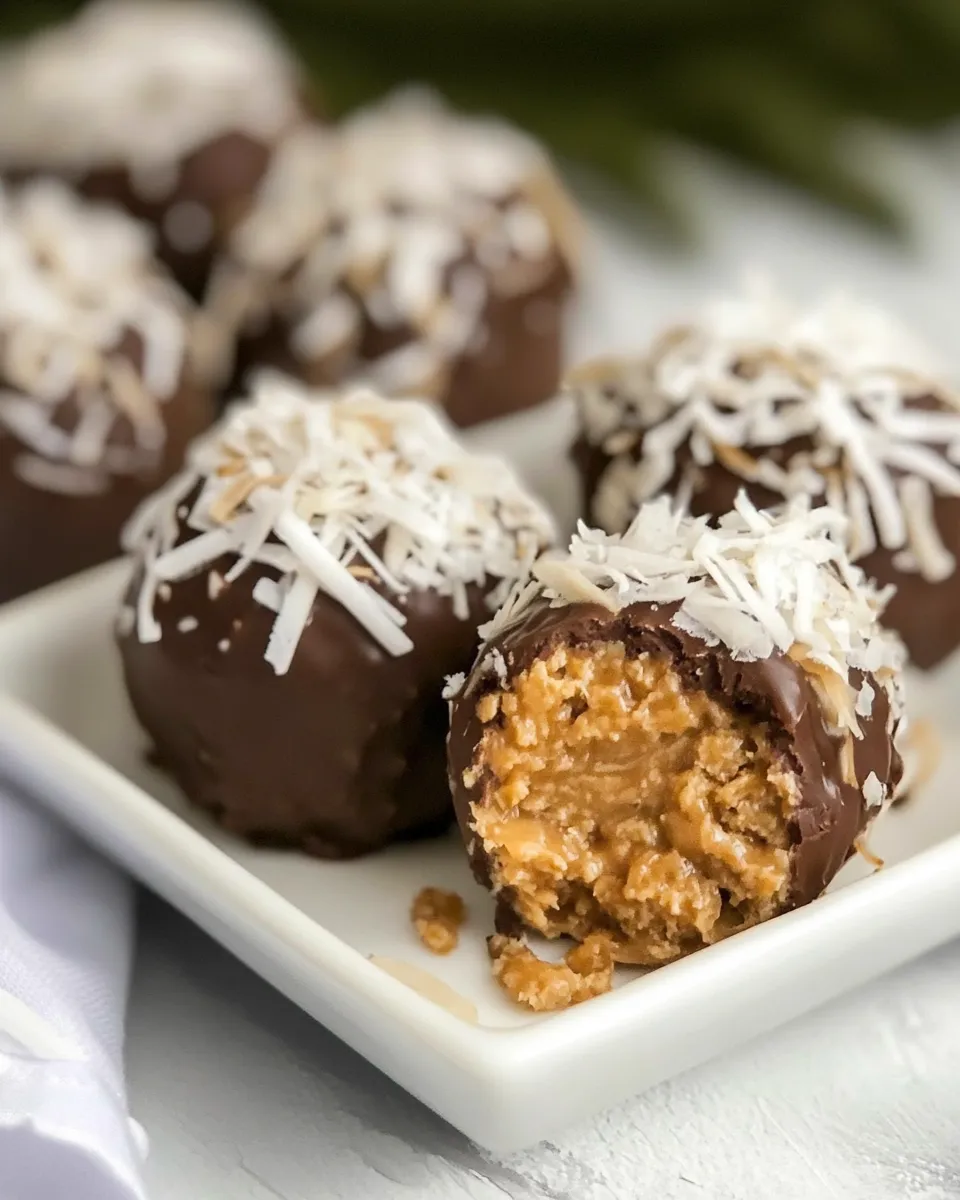
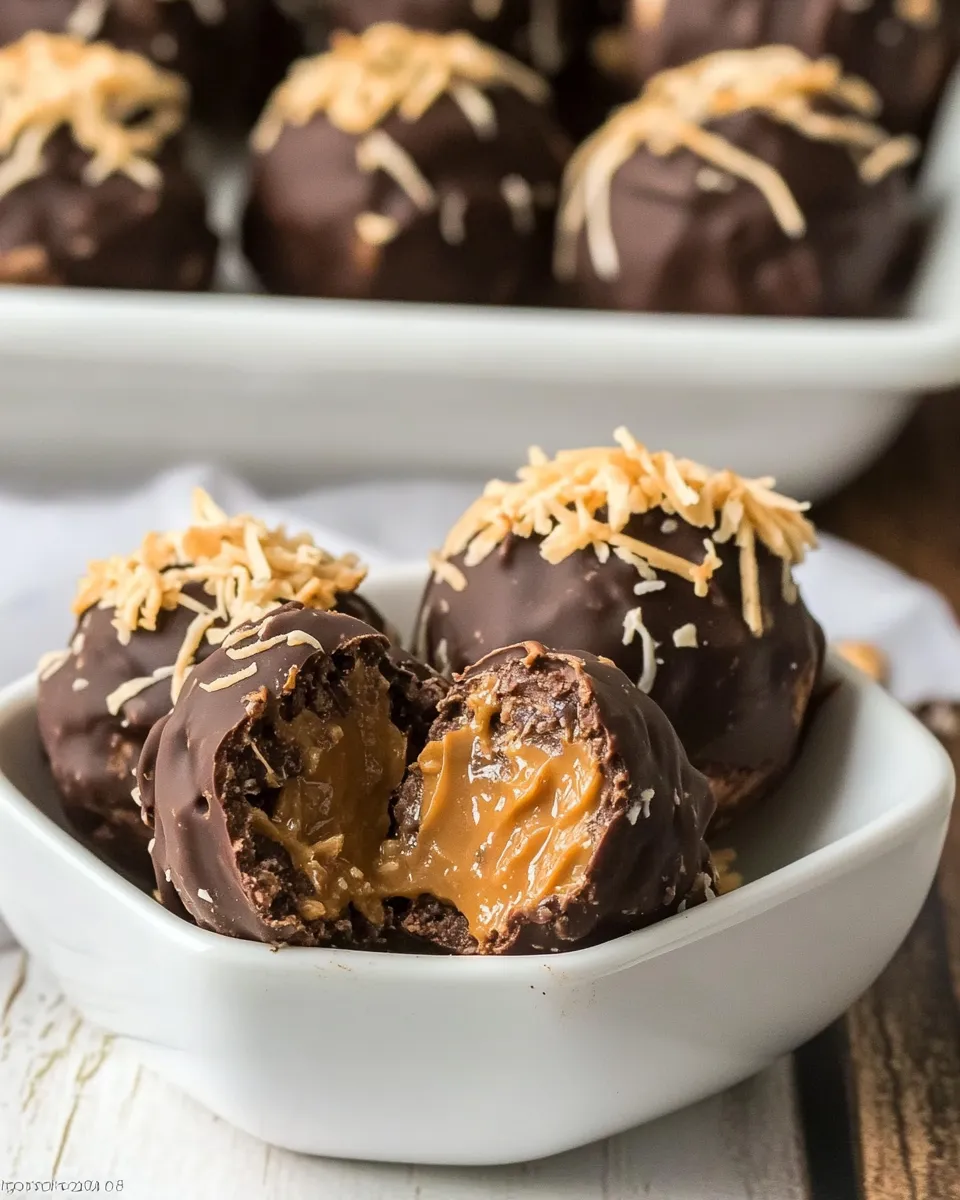
Samoa Truffles bring the iconic flavors of the popular Girl Scout cookie into a rich, bite-sized form that’s perfect for any occasion. The combination of sweetened shredded coconut, gooey caramel, and smooth chocolate creates a harmonious blend of textures and flavors. Unlike traditional cookies, these truffles are no-bake, making them a convenient option when you’re short on time but still want to impress. Plus, the presentation is stunning; they look just as good as they taste, making them a hit for parties or cozy evenings at home.
Ingredient Rundown
Creating Samoa Truffles requires just a handful of ingredients, each contributing to the irresistible flavor profile. Here’s what you’ll need:
- 2 cups sweetened shredded coconut: This is the star ingredient, giving the truffles their signature flavor and texture.
- 11 oz. store-bought soft caramels (such as Kraft): These will melt down beautifully to create the sweet, gooey center that ties everything together.
- 2 tbsp milk: This will help soften the caramels, making them easier to mix with the coconut.
- Salt: A pinch will enhance the sweetness of the caramel and balance the flavors.
- 10 oz. chocolate candy melts: This will be used for coating the truffles, providing a rich chocolate flavor that complements the coconut and caramel.
What’s in the Gear List
Before you start cooking, make sure you have the right tools to make your Samoa Truffles effortlessly:
- Mixing bowl: For combining the coconut and caramel mixture.
- Microwave-safe bowl: For melting the chocolate candy melts.
- Baking sheet: Line it with parchment paper to prevent sticking.
- Cookie scoop or tablespoon: To portion out the truffles evenly.
- Fork or dipping tool: For dipping the truffles in chocolate.
Cooking Samoa Truffles: The Process
Now that we have our ingredients and gear ready, it’s time to get cooking. Follow these simple steps to create your Samoa Truffles:
Step 1: Prepare the Caramel Mixture
In a microwave-safe bowl, combine the soft caramels and milk. Microwave in 30-second intervals, stirring in between, until the caramels are completely melted and smooth. This should take about 1-2 minutes.
Step 2: Mix in the Coconut
Once the caramel is melted, add the sweetened shredded coconut and a pinch of salt. Stir until the coconut is fully coated with the caramel mixture.
Step 3: Form the Truffles
Using a cookie scoop or tablespoon, portion out the coconut-caramel mixture and roll them into balls. Place the formed truffles onto a baking sheet lined with parchment paper. Once all the mixture is used, refrigerate the truffles for about 30 minutes to set.
Step 4: Melt the Chocolate
While the truffles are chilling, melt the chocolate candy melts in a microwave-safe bowl. Heat in 30-second intervals, stirring after each until smooth and fully melted.
Step 5: Coat the Truffles
Once the truffles have set, dip each one into the melted chocolate using a fork or dipping tool. Let any excess chocolate drip off before returning them to the parchment-lined baking sheet.
Step 6: Final Chill
After all truffles are coated in chocolate, place them back in the refrigerator for another 15-20 minutes to allow the chocolate to harden.
In-Season Swaps
If you want to get creative or adapt the recipe based on what’s available, consider these swaps:
- Nut allergies: Use sunflower seed butter instead of caramel for a nut-free version.
- Dark chocolate lovers: Swap the candy melts for dark chocolate for a richer flavor.
- Flavor variations: Add a teaspoon of vanilla extract to the caramel mixture for an extra flavor boost.
- Coconut alternatives: Use toasted coconut flakes for a deeper coconut flavor and crunch.
Testing Timeline
When developing this Samoa Truffles recipe, several tests were conducted to perfect the balance of flavors and textures. Here’s a brief timeline:
- Day 1: Tested caramel melting times and coconut ratios.
- Day 2: Experimented with different chocolate coatings.
- Day 3: Finalized truffle size and chilling times for optimal texture.
Storage Pro Tips
To keep your Samoa Truffles fresh and delicious, follow these storage tips:
Store the truffles in an airtight container at room temperature for up to 5 days. If you want to extend their shelf life, place them in the refrigerator, where they can last for up to 2 weeks. For longer storage, consider freezing the truffles. Just make sure to layer them between sheets of parchment paper in an airtight container, and they can last for up to 3 months in the freezer. When you’re ready to enjoy them, let them thaw at room temperature before indulging.
Samoa Truffles Q&A
Can I use homemade caramel instead of store-bought?
Absolutely! If you have a favorite homemade caramel recipe, feel free to use it. Just ensure it has a similar consistency to the store-bought variety for the best results.
Are Samoa Truffles gluten-free?
Yes, all the ingredients listed in this recipe are gluten-free. However, always check labels to ensure no gluten-containing ingredients are present.
How do I know when the chocolate is melted enough?
The chocolate should be smooth and glossy without any lumps. Stir it frequently while melting to prevent overheating, which can lead to a grainy texture.
Can I add nuts to the truffles?
Definitely! Chopped nuts like pecans or almonds can be mixed in with the coconut for added crunch and flavor. Just be sure to adjust the coconut ratio accordingly.
Desserts to Finish
If you’re looking to expand your dessert repertoire, consider trying these delightful recipes:
- Chocolate Coconut Macaroons
- No-Bake Peanut Butter Bars
- Coconut Cream Pie
- Chocolate Dipped Rice Krispie Treats
Wrap-Up
Samoa Truffles are an irresistible treat that combines the beloved flavors of coconut, caramel, and chocolate into a single, luscious bite. With minimal ingredients and simple steps, you can create a dessert that is sure to impress anyone lucky enough to try them. Whether you’re celebrating a special occasion or simply indulging your sweet tooth, these truffles are a guaranteed crowd-pleaser. Don’t hesitate to experiment with different flavors and toppings to make this recipe your own. Happy baking!
Samoa Truffles
Ingredients
Equipment
Method
- In a microwave-safe bowl, combine the soft caramels and milk. Microwave in 30-second intervals, stirring in between, until the caramels are completely melted and smooth. This should take about 1-2 minutes.
- Once the caramel is melted, add the sweetened shredded coconut and a pinch of salt. Stir until the coconut is fully coated with the caramel mixture.
- Using a cookie scoop or tablespoon, portion out the coconut-caramel mixture and roll them into balls. Place the formed truffles onto a baking sheet lined with parchment paper. Once all the mixture is used, refrigerate the truffles for about 30 minutes to set.
- While the truffles are chilling, melt the chocolate candy melts in a microwave-safe bowl. Heat in 30-second intervals, stirring after each until smooth and fully melted.
- Once the truffles have set, dip each one into the melted chocolate using a fork or dipping tool. Let any excess chocolate drip off before returning them to the parchment-lined baking sheet.
- After all truffles are coated in chocolate, place them back in the refrigerator for another 15-20 minutes to allow the chocolate to harden.
Notes
- Store truffles in an airtight container at room temperature for up to 5 days.
- For longer storage, refrigerate them for up to 2 weeks.
- Freeze truffles for up to 3 months, layered between parchment paper.