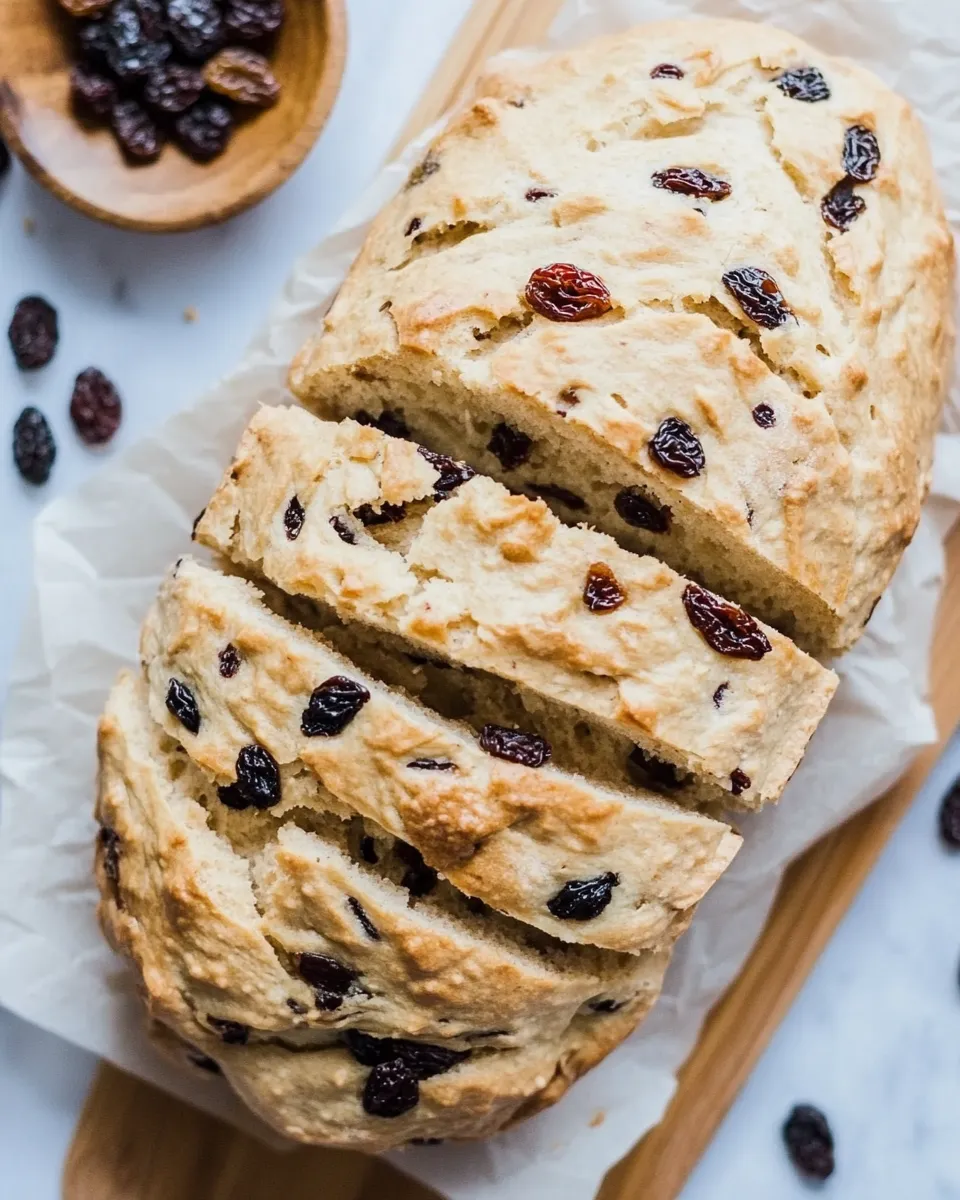
Raisin Bread for Raisin Lovers
Raisin bread is a warm, comforting treat that bridges the gap between sweet and savory with its delightful blend of spices and the chewy goodness of plump raisins. If you’re a raisin fan, this recipe will surely make your taste buds dance with joy. Whether you enjoy it toasted with a pat of butter or as the base for a decadent French toast, this raisin bread is versatile and utterly delicious. Let’s dive into the world of homemade raisin bread and learn how to create a loaf that will have your friends and family begging for more.
The Upside of Raisin Bread for Raisin Lovers
Raisin bread is not just a nostalgic staple; it’s a canvas for flavors and textures that can elevate your breakfast, snack, or dessert game. The sweetness of the raisins balances perfectly with the warmth of cinnamon, creating a harmonious profile that appeals to all ages. Plus, making your own raisin bread means you can control the ingredients, ensuring a fresher, more wholesome result than store-bought alternatives. It’s an inviting loaf that’s perfect for sharing, making it an excellent choice for gatherings or cozy mornings at home.
Ingredient List
- 1 large egg, lightly beaten
- 5 ounces milk, warmed to 95 to 125°F (see instructions below)
- ½ cup unsalted butter, melted and cooled slightly
- 2 teaspoons instant dry yeast (I recommend Red Star Platinum, one 1-ounce packet)
- 2 teaspoons granulated sugar
- 1 teaspoon ground cinnamon
- ½ teaspoon salt, optional and to taste
- 2 cups bread flour (plus up to 1/3 cup additional, if necessary)
- 1 cup raisins (heaping cup)
Setup & Equipment
- Mixing bowl: For combining your wet and dry ingredients.
- Dough scraper: Helpful for kneading and shaping the dough.
- Loaf pan: A standard 9×5 inch loaf pan works great for this recipe.
- Kitchen thermometer: To ensure your milk is at the right temperature for activating yeast.
- Clean kitchen towel: To cover the dough while it rises.
Mastering Raisin Bread for Raisin Lovers: How-To
Step 1: Prepare the Milk
Begin by warming your milk. Use a thermometer to ensure it reaches 95 to 125°F. This temperature range is perfect for activating the yeast without killing it. If you don’t have a thermometer, it should feel warm to the touch but not scalding.
Step 2: Mix Wet Ingredients
In a large mixing bowl, combine the warm milk, melted butter, and the lightly beaten egg. Stir until combined and let it sit for a few minutes to cool slightly if it feels too hot.
Step 3: Activate the Yeast
Sprinkle the instant dry yeast over the liquid mixture. Add the granulated sugar and let it sit for about 5-10 minutes, or until it becomes frothy. This indicates that the yeast is active and ready to work its magic.
Step 4: Combine Dry Ingredients
In another bowl, whisk together the bread flour, ground cinnamon, and salt (if using). Gradually add this mixture to the wet ingredients, stirring until a shaggy dough forms. If the dough feels too sticky, add additional flour, one tablespoon at a time, until it pulls away from the sides of the bowl.
Step 5: Knead the Dough
Transfer the dough to a lightly floured surface and knead for about 8-10 minutes. The dough should become smooth and elastic. During the last few minutes of kneading, incorporate the raisins into the dough, ensuring they are evenly distributed.
Step 6: First Rise
Place the kneaded dough into a greased bowl, cover it with a clean kitchen towel, and let it rise in a warm place until doubled in size, about 1-2 hours.
Step 7: Shape the Dough
Once risen, punch down the dough to release the air. Turn it out onto a floured surface and shape it into a loaf. Place the shaped dough into a greased loaf pan.
Step 8: Second Rise
Cover the loaf pan with the towel again and let it rise for another 30-45 minutes, or until it has risen slightly above the rim of the pan.
Step 9: Preheat the Oven
While the dough is rising for the second time, preheat your oven to 350°F (175°C).
Step 10: Bake the Bread
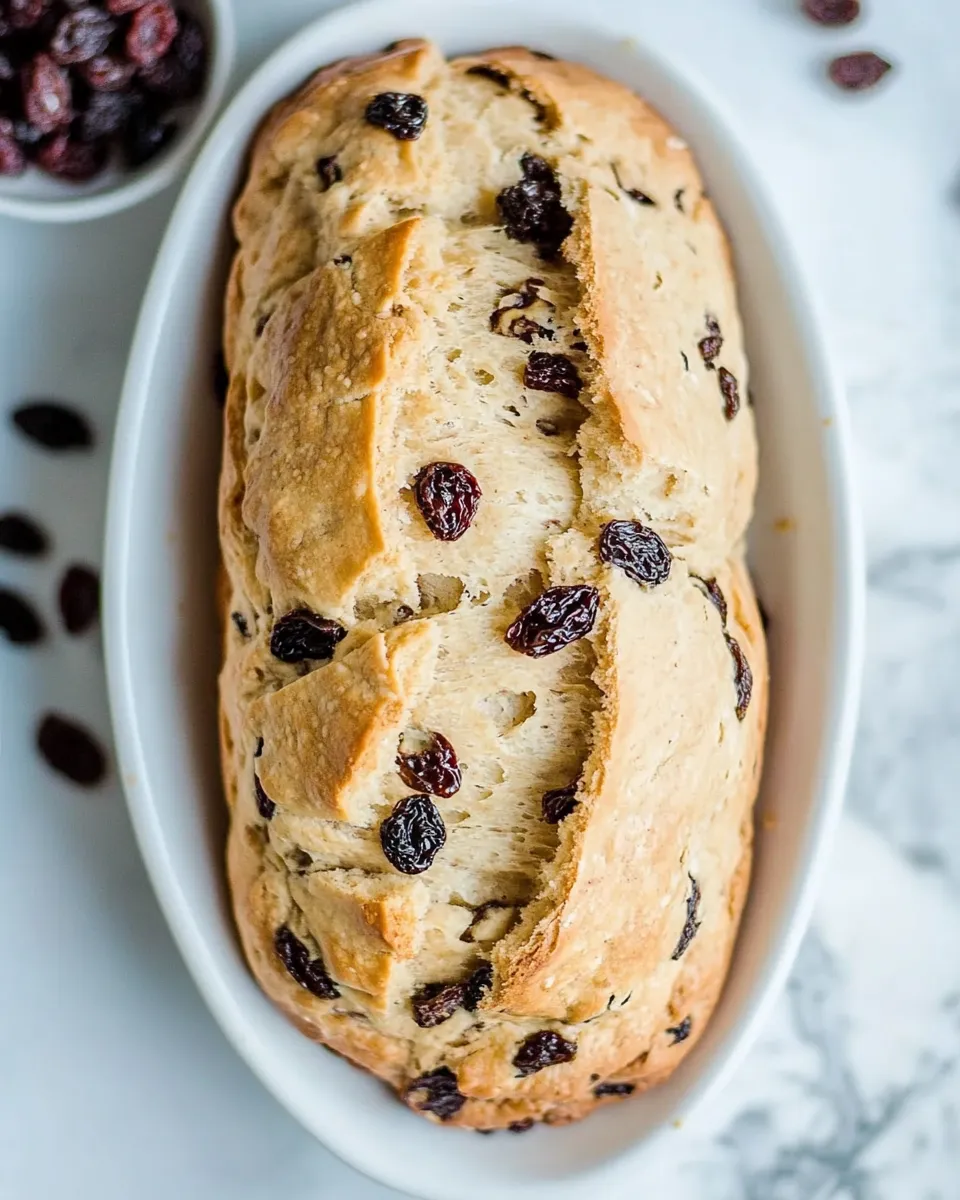
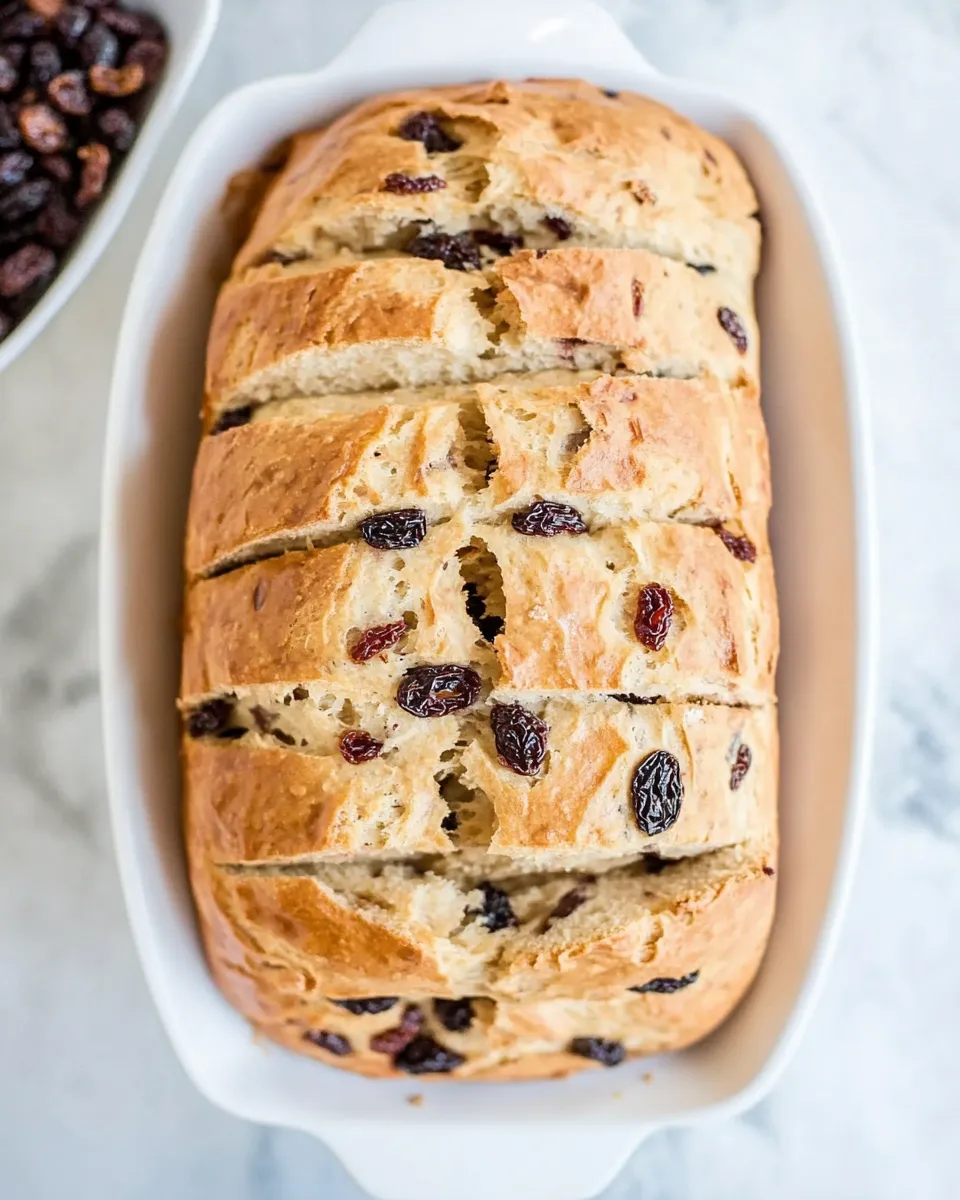
Once the dough has risen, place the loaf in the preheated oven and bake for 30-35 minutes, or until the top is golden brown and the bread sounds hollow when tapped. If the top browns too quickly, cover it loosely with foil.
Step 11: Cool the Bread
After baking, remove the bread from the oven and allow it to cool in the pan for about 10 minutes. Then, transfer it to a wire rack to cool completely before slicing.
Dairy-Free/Gluten-Free Swaps

- Dairy-free milk: Substitute regular milk with almond milk, oat milk, or coconut milk.
- Butter alternative: Use coconut oil or a dairy-free butter substitute.
- Gluten-free flour: Replace bread flour with a 1:1 gluten-free baking flour. Be sure to include a binding agent like xanthan gum if your blend doesn’t contain it.
Troubles You Can Avoid
- Yeast not activating: Ensure your milk is at the correct temperature and not too hot, as it can kill the yeast.
- Dough too sticky: Add flour gradually while kneading to achieve the right consistency.
- Over-baking: Keep an eye on the bread during the last few minutes of baking to avoid dryness.
- Raisins sinking: Toss raisins in a bit of flour before adding them to the dough to help them stay suspended.
Refrigerate, Freeze, Reheat
Your homemade raisin bread can be stored at room temperature for up to 3 days in a sealed container or bag. For longer storage, slice the bread and freeze it in an airtight container for up to 3 months. To reheat, simply pop slices in the toaster or warm the whole loaf in a low oven until heated through.
Questions People Ask
Can I use other dried fruits instead of raisins?
Absolutely! Dried cranberries, apricots, or even a mix of your favorite dried fruits can be a delicious twist on this classic recipe.
What should I do if my dough doesn’t rise?
If your dough doesn’t rise, check that your yeast is fresh and that the liquids were at the right temperature. You can also try placing the dough in a warmer spot or a turned-off oven with the light on to encourage rising.
Can I make this bread without cinnamon?
Yes! If you prefer a plain raisin bread, simply omit the cinnamon. You can also experiment with different spices like nutmeg or cardamom for a unique flavor profile.
How can I tell when the bread is done baking?
The bread is done when it’s golden brown on top and sounds hollow when tapped on the bottom. You can also use an instant-read thermometer; the internal temperature should be around 190°F (88°C).
Explore More
That’s a Wrap
Raisin bread is a delightful way to enjoy the sweet and chewy goodness of raisins in a soft, homemade loaf. With a straightforward recipe and a few simple steps, you can create a comforting treat that’s perfect for breakfast, snacks, or even dessert. The aroma of freshly baked raisin bread wafting through your home is simply unbeatable. So grab your ingredients, roll up your sleeves, and enjoy the warm embrace of this delightful loaf. Whether you share it with loved ones or keep it all to yourself, this raisin bread for raisin lovers is sure to bring joy to your kitchen.
Raisin Bread for Raisin Lovers
Ingredients
Equipment
Method
- Begin by warming your milk. Use a thermometer to ensure it reaches 95 to 125°F. This temperature range is perfect for activating the yeast without killing it.
- In a large mixing bowl, combine the warm milk, melted butter, and the lightly beaten egg. Stir until combined and let it sit for a few minutes to cool slightly if it feels too hot.
- Sprinkle the instant dry yeast over the liquid mixture. Add the granulated sugar and let it sit for about 5-10 minutes, or until it becomes frothy.
- In another bowl, whisk together the bread flour, ground cinnamon, and salt (if using). Gradually add this mixture to the wet ingredients, stirring until a shaggy dough forms.
- Transfer the dough to a lightly floured surface and knead for about 8-10 minutes. The dough should become smooth and elastic. During the last few minutes of kneading, incorporate the raisins into the dough.
- Place the kneaded dough into a greased bowl, cover it with a clean kitchen towel, and let it rise in a warm place until doubled in size, about 1-2 hours.
- Once risen, punch down the dough to release the air. Turn it out onto a floured surface and shape it into a loaf. Place the shaped dough into a greased loaf pan.
- Cover the loaf pan with the towel again and let it rise for another 30-45 minutes, or until it has risen slightly above the rim of the pan.
- While the dough is rising for the second time, preheat your oven to 350°F (175°C).
- Once the dough has risen, place the loaf in the preheated oven and bake for 30-35 minutes, or until the top is golden brown and the bread sounds hollow when tapped.
- After baking, remove the bread from the oven and allow it to cool in the pan for about 10 minutes. Then, transfer it to a wire rack to cool completely before slicing.
Notes
- Store your homemade raisin bread at room temperature for up to 3 days in a sealed container.
- Freeze sliced bread in an airtight container for up to 3 months for longer storage.
- Reheat slices in the toaster or warm the whole loaf in a low oven until heated through.